

Events Concept
Available at:


This article aims to explain the concept and usability of Events in Demander.
- Demo video
Event Concept
Section titled “Event Concept”Events are pre-planned events. Today, in Demander, it is possible to register, edit and delete events both in the web environment and in the application, as well as manage their status and completions.
How to Configure Before registering an event in the system, it is necessary to pre-configure some screens first, such as: “Event Types”, “Event Status” and “Company Settings”;
* Event Type To register events, you must select the Type of Event you wish to use, therefore, they must be registered in advance within Demander. Registration can be done directly on Demander Web, on the “Event Type” screen or via integration through the table 90 - Event Type.
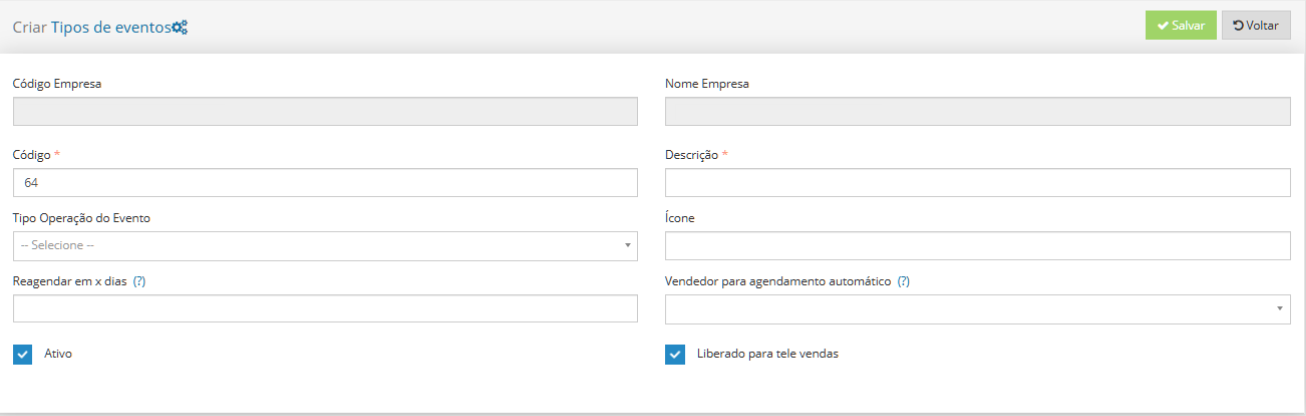
Code*: Code that identifies the Event (Code must be numeric. There cannot be two identical codes); Description: Name of the event you wish to use (For specific modules that also use events, such as check-in, the nomenclature must follow exactly what is presented in the articles);
Types of Operation: These are operations referring to other Demander features that can be used in conjunction with the Event. (If you wish to use the event as a solo module, this field does not need to be filled in); Icon: Icon visible next to the event in the Demander app, only ONE per type of event (If not filled in, it will have a default icon). To see which icons can be placed, simply access “Event Icon List”; Reschedule in x days: If a rescheduling date was not provided when registering an event and the event type has this field filled in, the rescheduling will be calculated automatically by the system;
Seller for automatic scheduling: This will be the seller for whom an event will be automatically scheduled on tele sales for this type of event;
Active: Inactive Event Types cannot be used;
Released for Tele Sales: If Released, the Event Type appears on the Tele Sales screen to register an Event.
Event Status
Section titled “Event Status”After registering an event, it may have a different status to follow according to event updates. However, statuses also need to be pre-registered. Registration can be done directly on Demander Web, on the “Event Status” screen or via integration through the table 92 - Event Status.
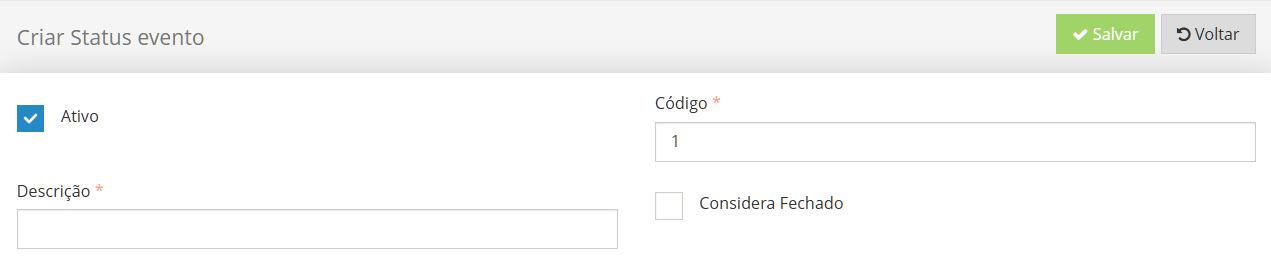
Active: Inactive Event Statuses cannot be used in Events
Code*: Code that identifies the Event.
Description: Name of the status that will appear in the Event.
Considers Closed: When placing a status that considers closed, the event will be automatically closed.
Events Button on Mobile
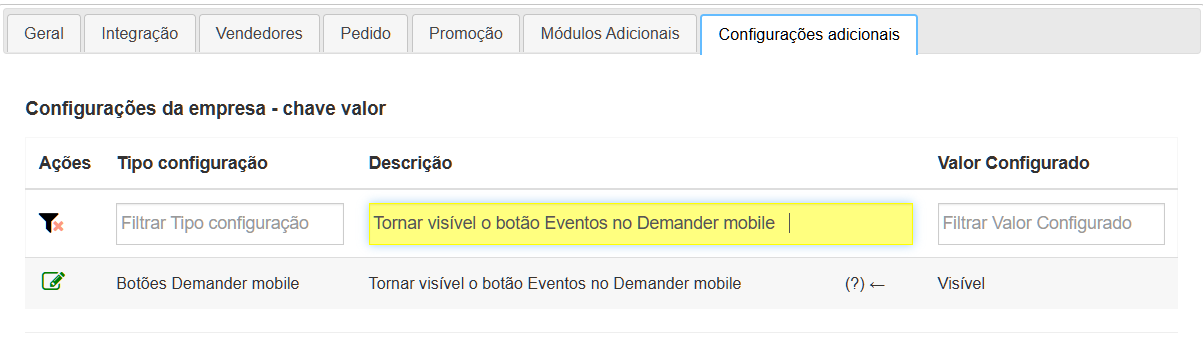
Section titled “Events Button on Mobile”After configuring the Event types and Event Statuses, you must release the Events button to appear in the application.
To do this, simply access the Company Settings  Additional settings screen, the option “Make the Events button visible on Demander mobile” will appear.
How to register an Event on Demander Web
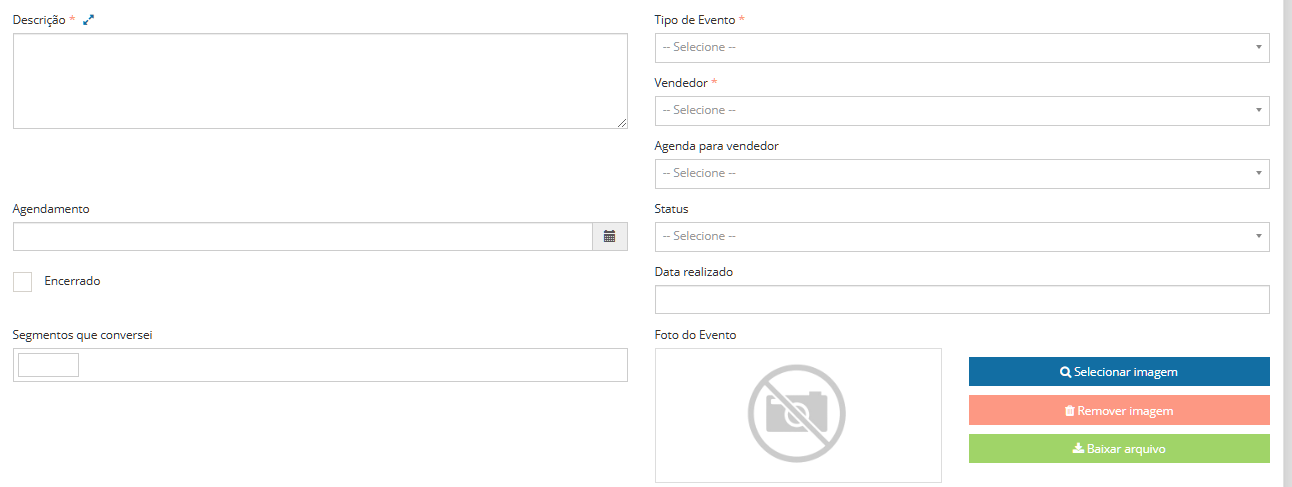
Section titled “How to register an Event on Demander Web”To register an Event on Demander Web, simply access the [Tele Sales] screen (https://sistema.demander.com.br/dinamico/televendas) or the [Customer] registration (https://sistema.demander.com.br/dinamico/clientes) in the “Events” tab. The same Event registration layout will open on both screens.
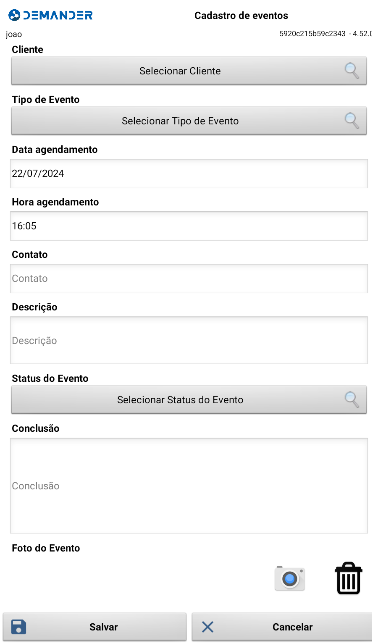
How to register an Event on the Application To register an event in the application, simply access the Events button or through the Customer registration in the “Events” tab
︎
Auxiliary Fields on the Event screen
Section titled “Auxiliary Fields on the Event screen”On the Event screen, it is possible to include Auxiliary Fields to add extra information, customized according to the Event Type. For example, the “A” field will appear on the events screen only if the selected event type is “Y”.
These additional fields are varied and may include signatures, extra photos, or other optional fields.It is important to highlight that you can create auxiliary fields for each type of event.
See our article on Auxiliary Fields Functionality to understand the functionality, how to configure it and explore the available options.
NOTE: On the Auxiliary Fields registration screen, it is necessary to select “Event Type” in the “Field Type” option.
Demo video