

Personalized information when printing the order
- This article explains how to customize Recipient, Issuer, and Order Data information when printing orders.
Introduction
Section titled “Introduction”Customizing Recipient, Issuer, and Order Data information allows configuring the text displayed in the order printout header. This customization applies only to order printing; NF-e printing uses the information contained in the received XML.
-
Important: Use the HTML break tag for line breaks, for example:
-
Ex: First line
Second line
etc…
Issuer Information
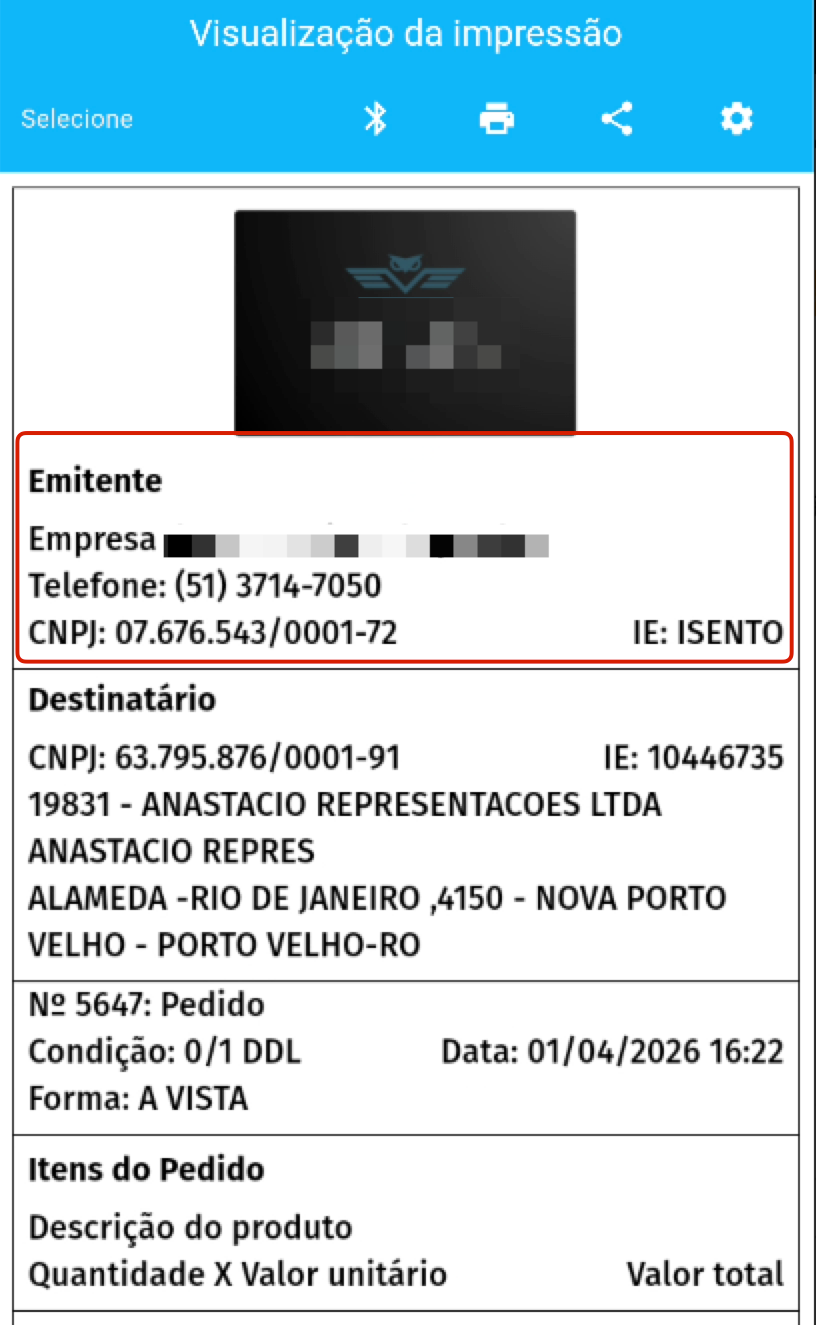
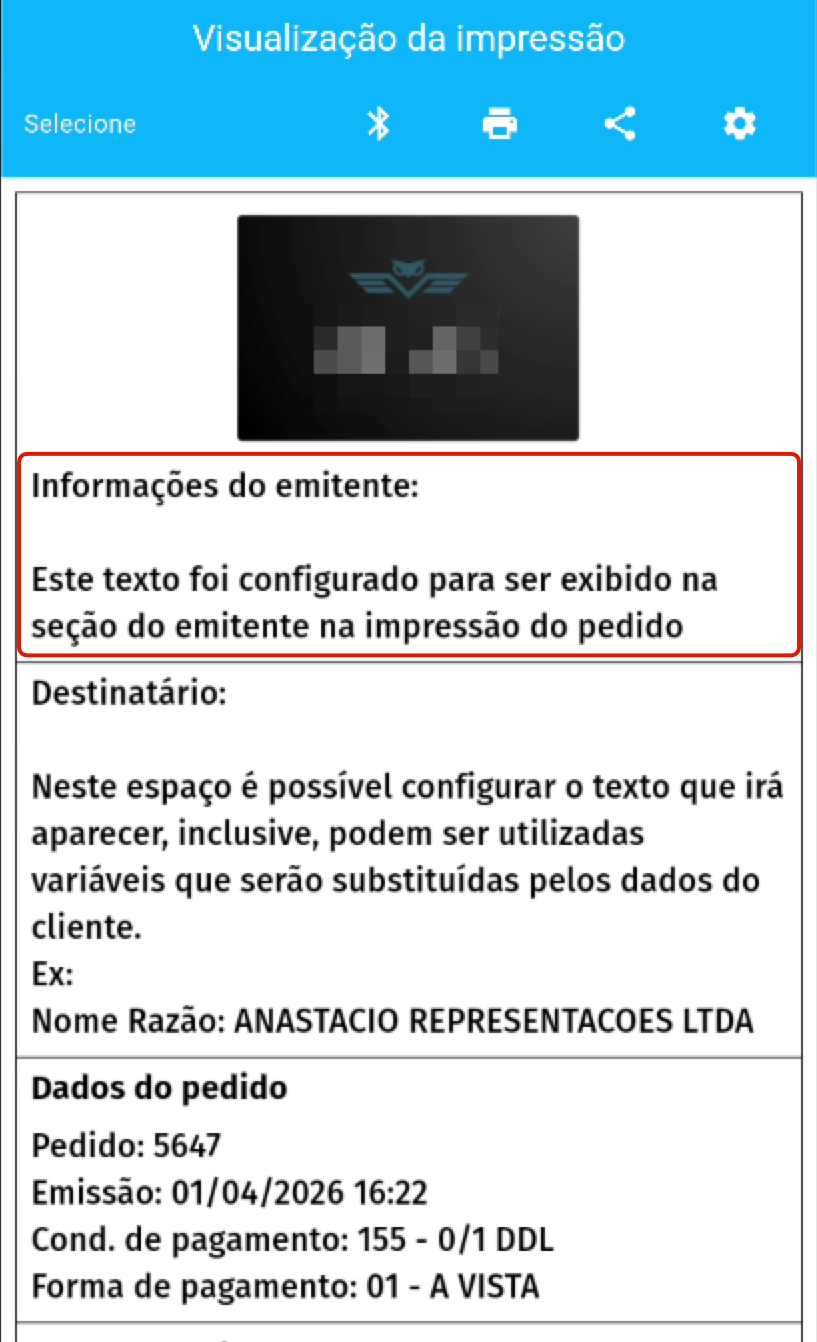
Section titled “Issuer Information”The information configured to replace issuer data will be displayed according to the examples below:
Recipient Information
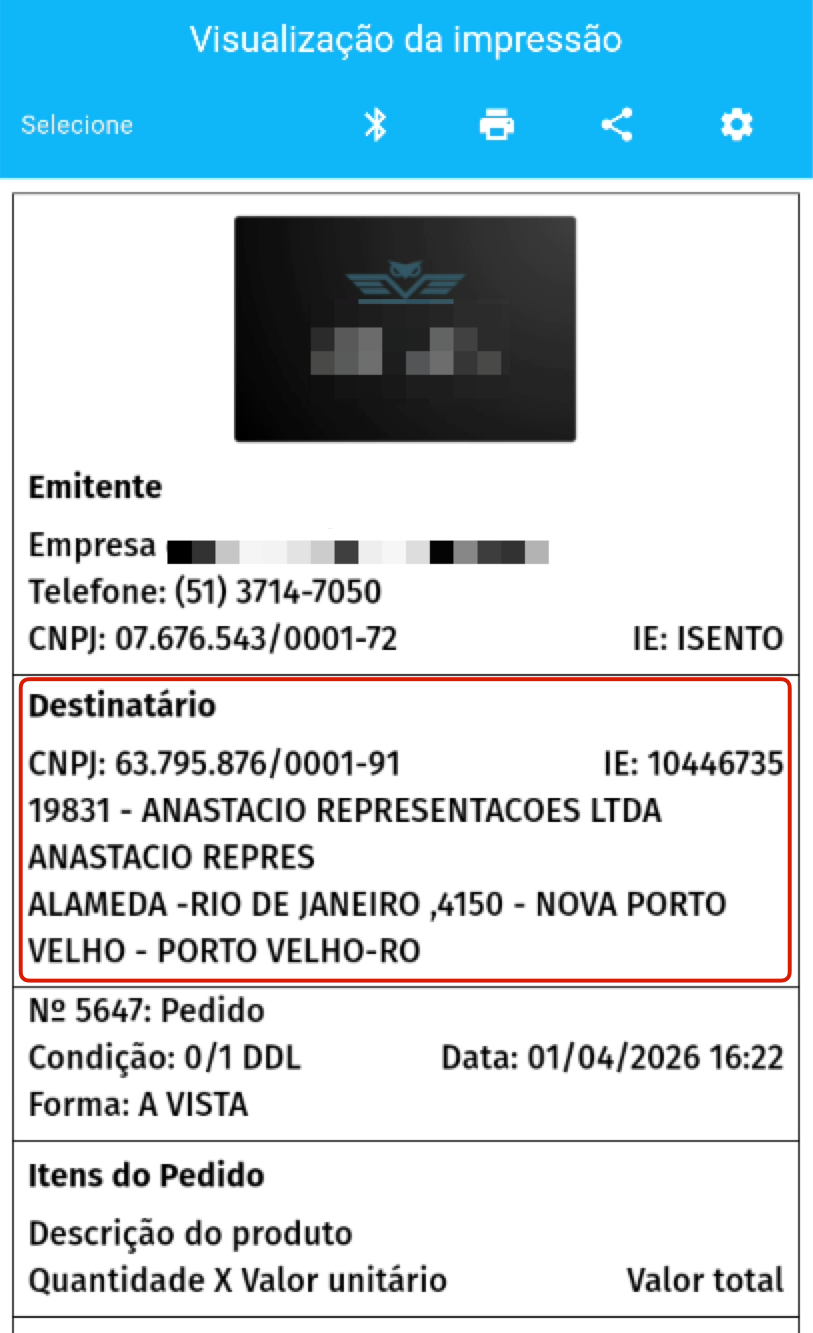
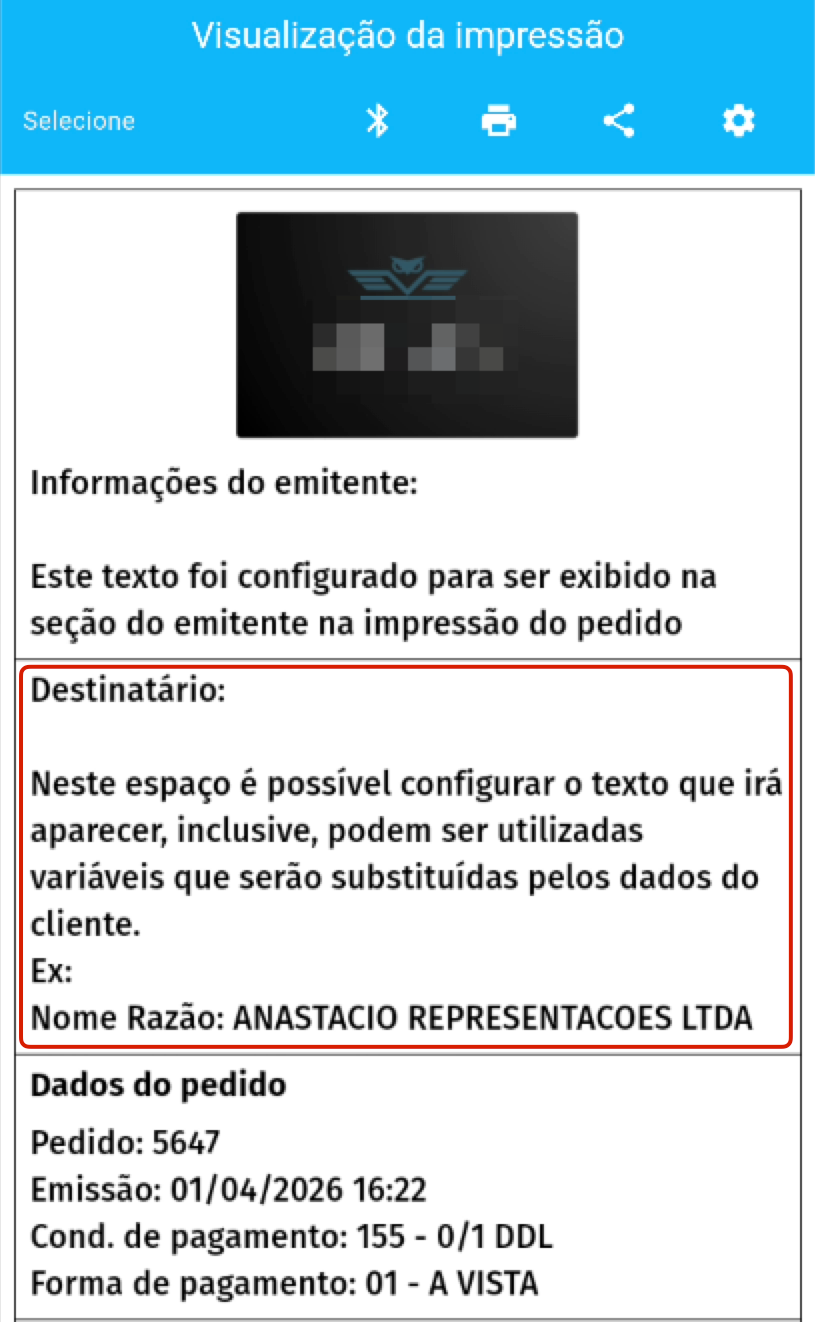
Section titled “Recipient Information”The information configured to replace recipient data will be displayed according to the examples below. You can also use variables that are dynamically replaced at the time of printing.
Available Variables for Recipient
Section titled “Available Variables for Recipient”- {cliente.codigo}: Customer code
- {cliente.nomeRazao}: Legal name / Company name
- {cliente.nomeFantasia}: Trade name
- {cliente.cpfCnpj}: CPF or CNPJ
- {cliente.rgIe}: State Registration / ID
- {cliente.inscMunicipal}: Municipal Registration
- {cliente.telefone1}, {cliente.telefone2}: Phone numbers
- {cliente.emailNfe}, {cliente.emailComprador}, {cliente.emailFinanceiro}: Customer emails
- {cliente.endereco}, {cliente.numero}, {cliente.complemento}, {cliente.bairro}, {cliente.cep}, {cliente.uf}: Full address
- {cliente.limiteCredito}: Credit limit (currency)
- {cliente.dataNascimento}: Birth date
- {cliente.descricao}: Customer description
- {cliente.observacao}: Notes
Example: Hello {cliente.nomeFantasia}
Phone {cliente.telefone1}
Email {cliente.emailNfe}
Order Data Information
Section titled “Order Data Information”The information configured to replace order data will be displayed according to the examples below. You can also use variables that are dynamically replaced at print time.
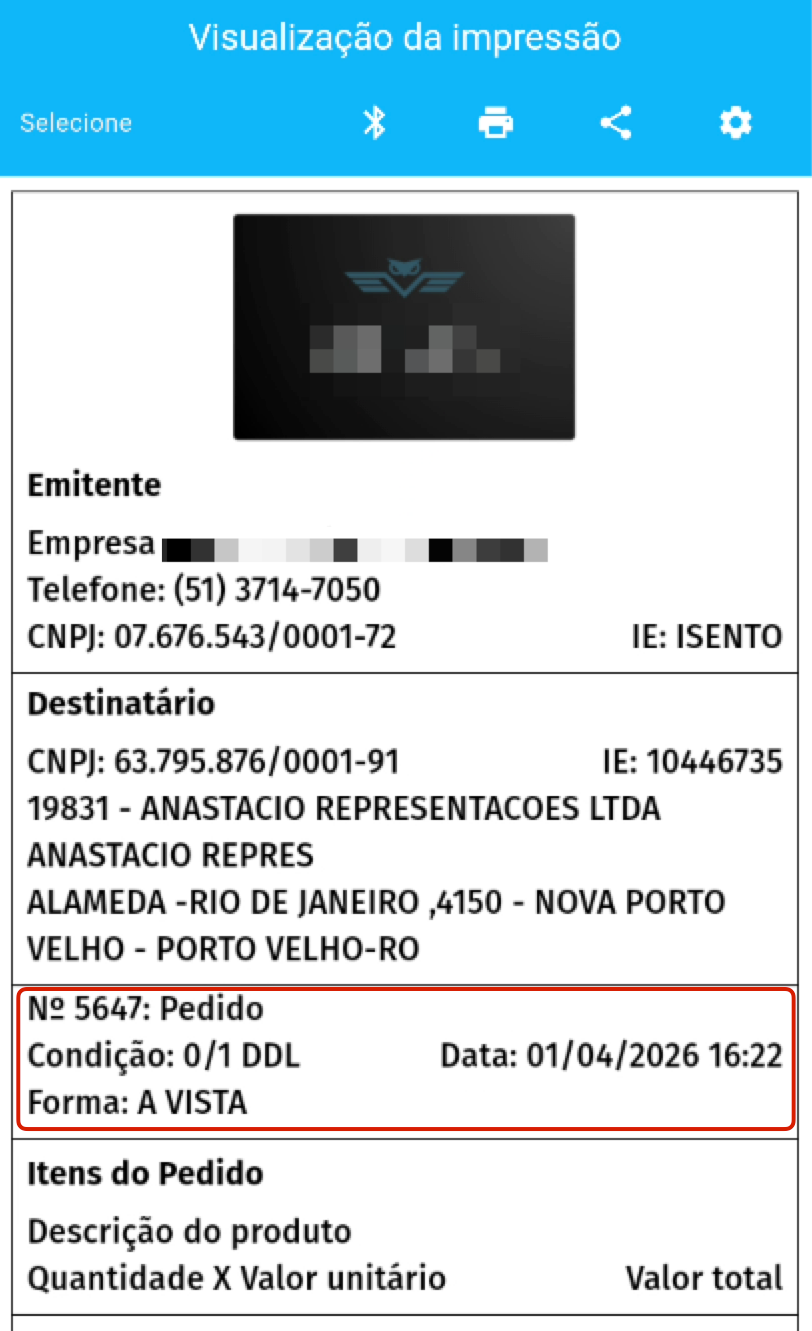
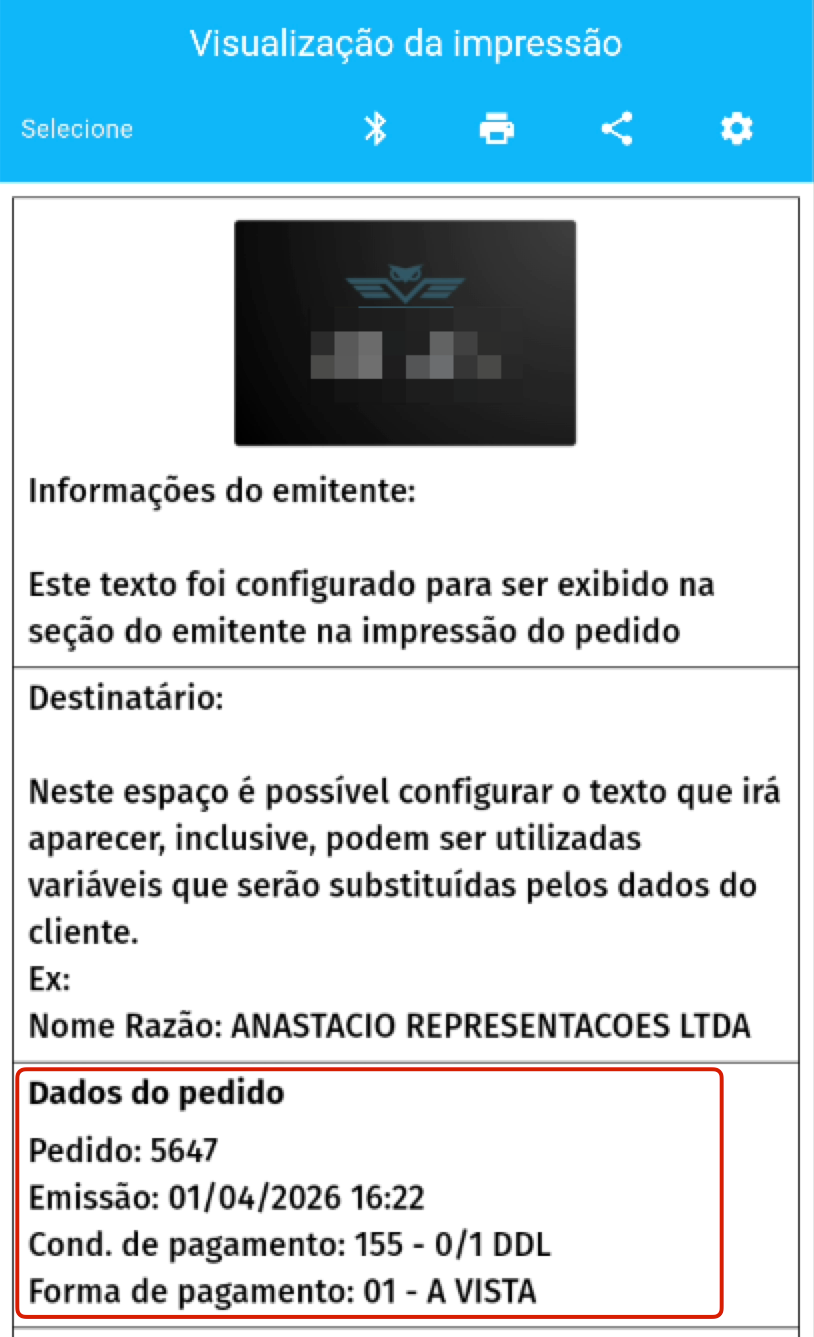
Order Variables
Section titled “Order Variables”- {pedido.codigo}: Internal order code
- {pedido.numero}: Order number
- {pedido.dataEmissao}: Issuance date and time
- {pedido.previsaoEntrega}: Expected delivery date
- {pedido.tipoPedido.descricao}: Order type description
- {pedido.ordemCompra}: Purchase order number
- {pedido.observacao}: General order note
- {pedido.observacaoCliente}: Customer note entered on order
- {pedido.observacaoIntegracao}: Integration note
- {pedido.valorFrete}: Shipping value
- {pedido.valorIPI}: Total IPI value
- {pedido.valorICMSST}: Total ICMS ST value
- {pedido.totalTaxaAdicional}: Total additional fee value
- {pedido.valorTotalPedido}: Total order value
- {pedido.descontoDestacado}: Highlighted order discount
- {pedido.pesoBruto}: Gross weight
- {pedido.pesoLiquido}: Net weight
- {pedido.cubagem}: Cubing
- {pedido.numPedidoERP}: ERP order number (when available)
- {pedido.condicaoPagamento.codigo} / {pedido.condicaoPagamento.descricao}: Payment condition
- {pedido.formaPagamento.codigo} / {pedido.formaPagamento.descricao}: Payment method
- {pedido.transportadora.codigo} / {pedido.transportadora.descricao}: Carrier
- {pedido.redespacho.codigo} / {pedido.redespacho.descricao}: Redispatch
- {pedido.listaPreco.codigo} / {pedido.listaPreco.descricao}: Price list
- {pedido.vendedor.codigo} / {pedido.vendedor.nome}: Order salesperson
- {pedido.vendedorEmissor.codigo} / {pedido.vendedorEmissor.nome}: Issuing salesperson
Note: related fields (payment condition/method, carrier, redispatch, price list, salesperson) depend on data being available in the order at print time. When a field has no value, it is replaced with empty.
Exemplo
- Pedido: {pedido.codigo}
Data de emissão: {pedido.dataEmissao}
Payment condition: {pedido.condicaoPagamento.codigo} - {pedido.condicaoPagamento.descricao}
Payment method: {pedido.formaPagamento.codigo} - {pedido.formaPagamento.descricao}
Frequently Asked Questions
Section titled “Frequently Asked Questions”How to configure “Issuer information for order printing”?
Section titled “How to configure “Issuer information for order printing”?”- Go to Company Settings > “Additional Settings” tab.
- Locate “Issuer information for order printing” and enter the desired text for the “Issuer” block.

How to configure “Recipient information for order printing”?
Section titled “How to configure “Recipient information for order printing”?”- Acesse Configurações da Empresa > Aba “Configurações Adicionais”.
- Locate “Recipient information for order printing” and enter the desired text for the “Recipient” block.

How to configure “Order data information for order printing”?
Section titled “How to configure “Order data information for order printing”?”- Acesse Configurações da Empresa > Aba “Configurações Adicionais”.
- Locate “Order data information for order printing”.
- Enter the text you wish to display in the “Order data” block. You can combine multiple dynamic tags such as {pedido.codigo}, {pedido.dataEmissao}, {pedido.condicaoPagamento.descricao}.
