Registration for Check-in and Check-out (Checkin)
Available at:

This article aims to explain the necessary configurations so that the check-in functionality can be used in Demander Checkin is used to define whether the seller must be within a radius of the customer to place the order for the customer.
Company Configuration on Checkin
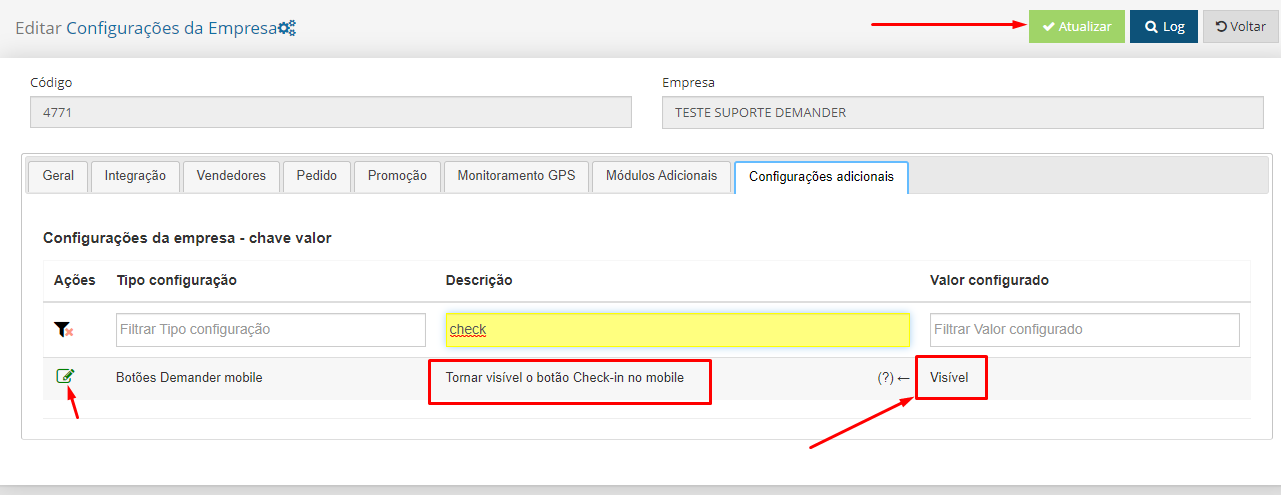
Section titled “Company Configuration on Checkin”- Access Company Settings, Additional Settings tab, look for the setting “Make the Check-in button visible on mobile”, leave it “Visible” and click “Update” to Save the change.
Seller Configuration
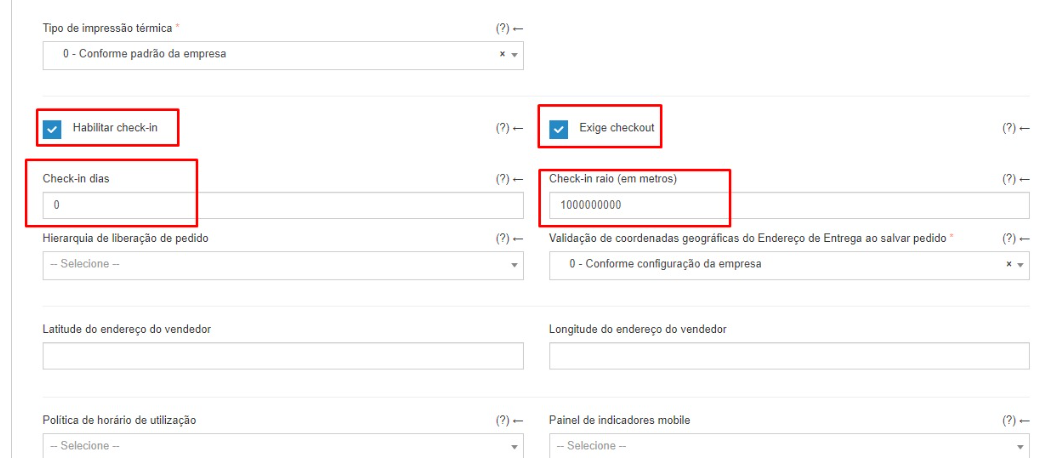
Section titled “Seller Configuration”- Access the Seller Registration, Configuration tab, select the “Enable Check-in” and Require Check-out“ settings. Also configure the “Check-in radius (in meters)” field.
- Requires check-in check-out: check box that forces the user to check-in when starting a new order and check-out when finishing the customer visit.
- Days between check-ins: entire field that defines the maximum period that the user can stay without taking any action for the customer. This interval is defined in days.
- Check-in radius (in meters): integer field that defines the radius that the user must be from the customer to be able to perform an action. This radius is measured in meters.
Client configuration
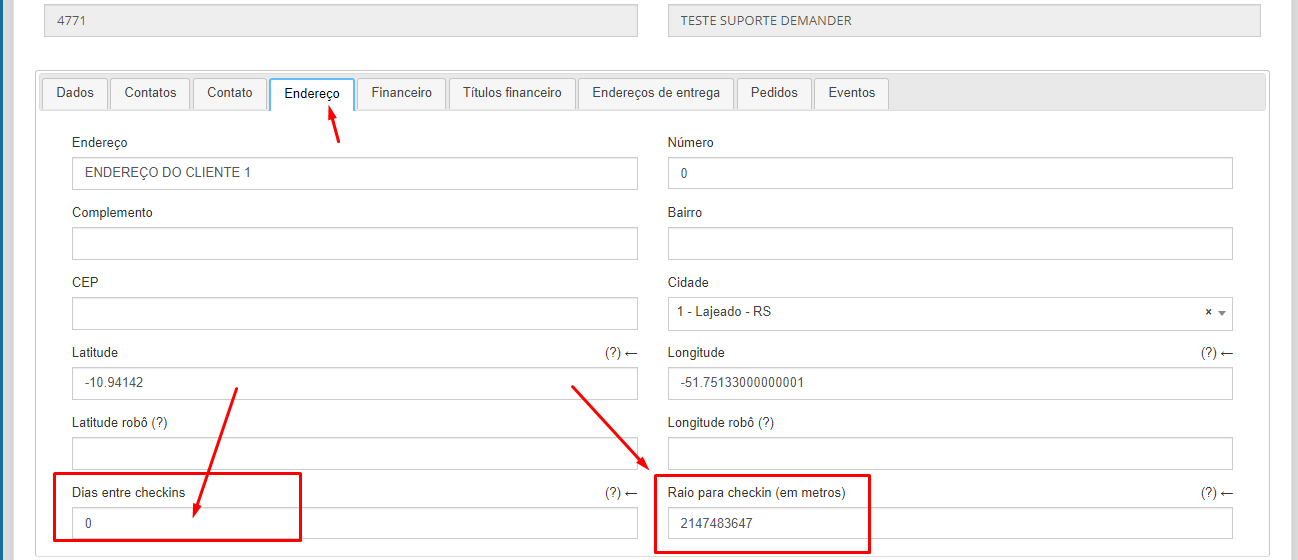
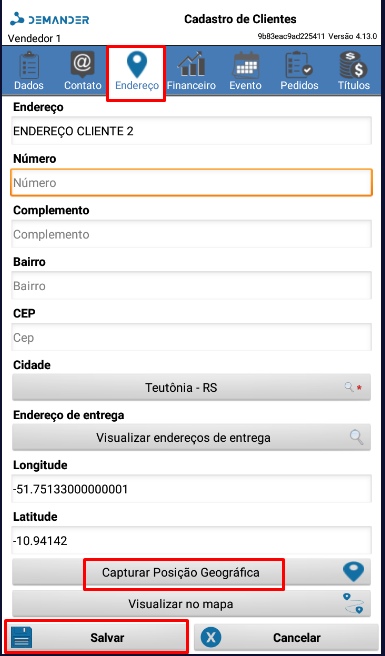
Section titled “Client configuration”- Access the Customer Registry, Address tab, configure the “Days between Check-in” and “Radius for Check-in (in meters).
- Days between check-ins: entire field that defines the maximum period that the user can stay without taking any action for the customer. This interval is defined in days.
- Check-in radius (in meters): entire field that defines the radius that the user must be from the customer to be able to perform an action. This radius is measured in meters.
- Latitude and Longitude: which defines the customer’s location. This information is used to calculate the distance between the user and the customer.
(Note) Latitude and Longitude can be sent via integration or collected by the Seller using the Demander App. To collect Latitude and Longitude through the App, enter the customer registration, Address tab and click on “Capture geographic position”.
Configuration of Event Types
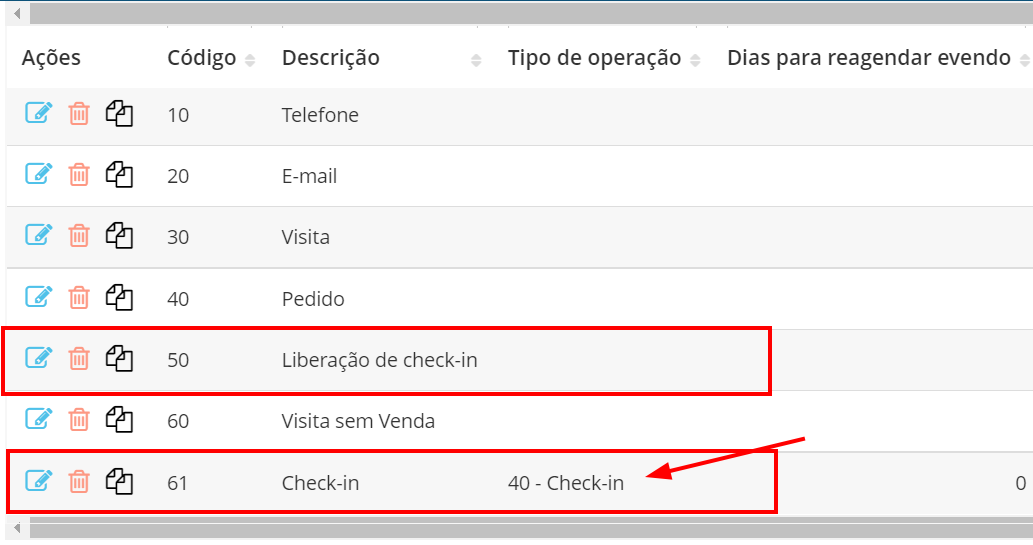
Section titled “Configuration of Event Types”- Access the [Types of events] screen (https://sistema.demander.com.br/dinamico/tipos-eventos), so that 2 types of events can be registered.
- Demander’s Check-in functionality works in conjunction with the Event Module. Every time a check-in is carried out, an event is automatically registered, ensuring that the visit, service or activity carried out by the user is documented in the system.
Important: For Check-in to work correctly, event type registration must be configured. Otherwise, the functionality will not work.
When configuring the event, it is mandatory to fill in the fields correctly:
- Description
- Type of Operation
- In the print below, you can see an example of correct filling:
Tip: Disable all customer action buttons on the mobile main screen
- To work correctly with check-in and check-out, it is necessary to hide all buttons that create an event for the customer. Example: New order, Orders, Customers, Events, Visit without Sales, Sales Action, among others. This is done in Company Settings->>Additional Settings.
- Reason: the user will only be able to interact with customer data when within the configured radius and within the limit period.
Start order automatically after Check-in
Section titled “Start order automatically after Check-in”Access Company Settings, Additional Settings tab, look for the setting “Only register Event when registering Checkin”, leave it as “No” and click “Update” to Save the change.
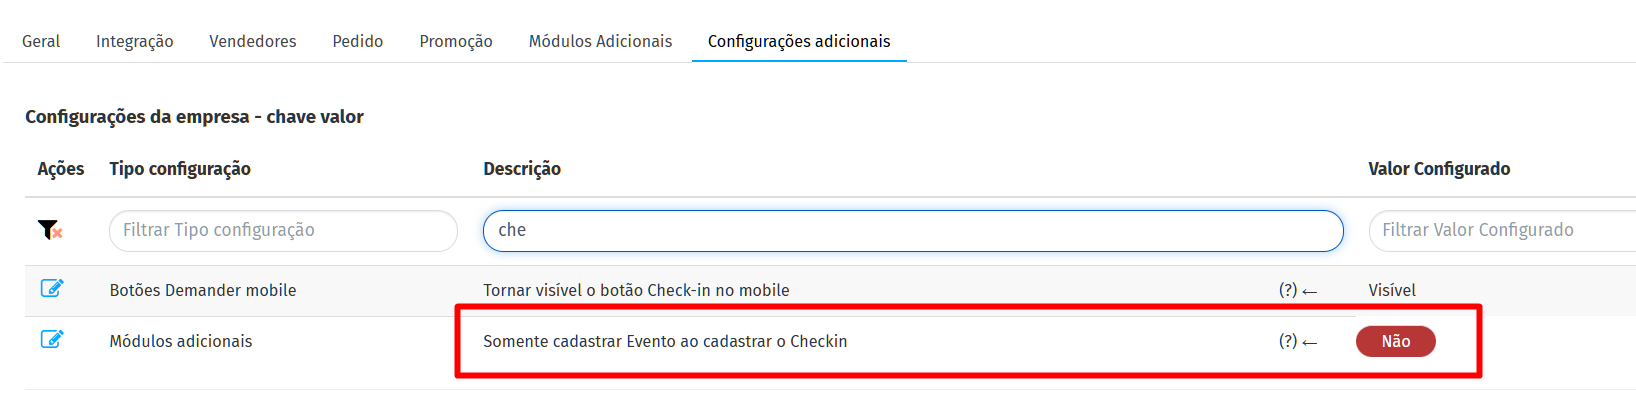
Photo when checking in
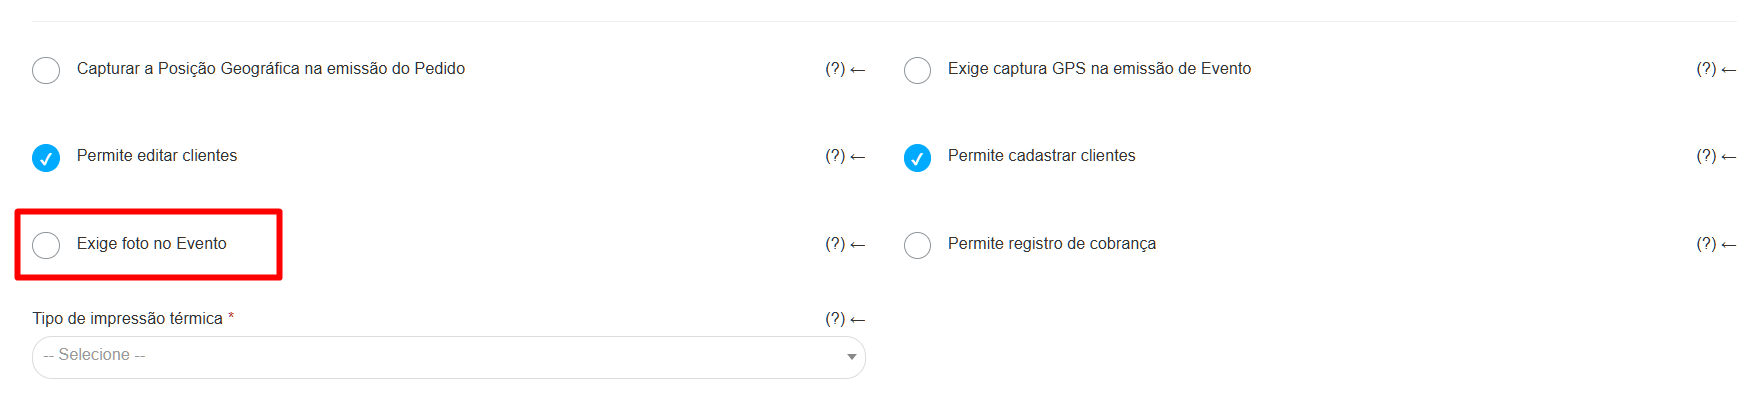
Section titled “Photo when checking in”Access Vendor Registration, Configuration tab, select the option “Requires photo at Event”.