

Creating a custom filter
In Demander Web, several listing screens allow you to create a custom filter to restrict the records shown. Not every screen has this option. This article uses the Orders screen as an example.
How to create a custom filter
Section titled “How to create a custom filter”- Open the listing you want (for example, Orders).
- Click the three-line icon next to the screen title (filter menu).

- Click New custom filter.

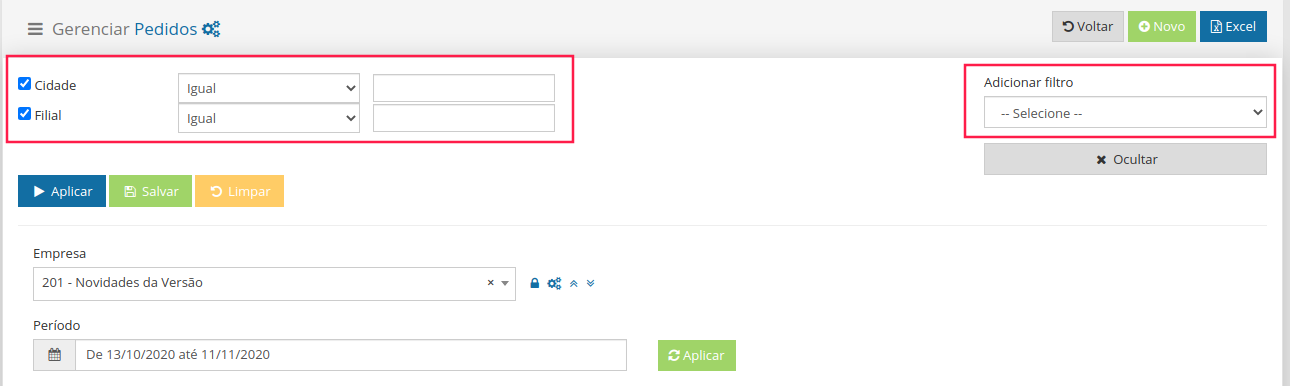
- In Add filter (on the right), choose the criteria you want. Each selected option moves to the left area. In the example below, City and Branch were used.
- Fill in the values and click Apply to see the result in the listing.
How to save the filter
Section titled “How to save the filter”- With the filter set up, click Save.
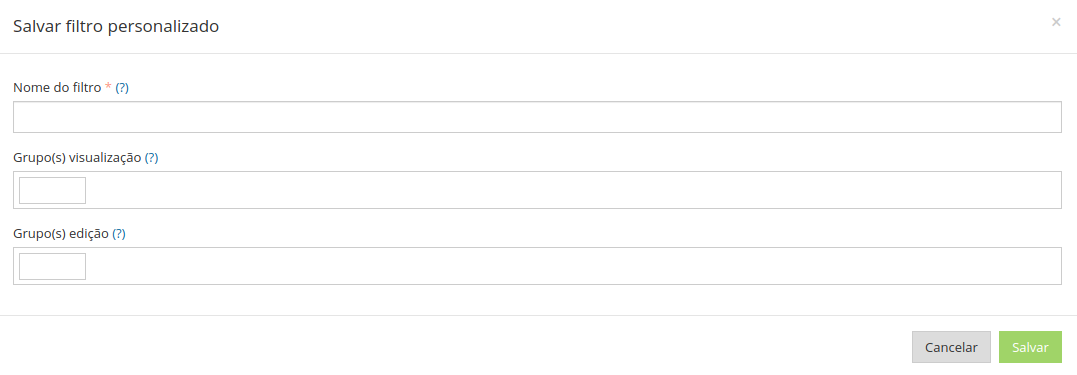
- Enter the Filter name.
- Optionally, associate the filter with a user group that can view or edit it.
- Confirm the save.
After saving, the filter appears again when you click the three-line icon.

Does the filter remain after you finalize an order?
Section titled “Does the filter remain after you finalize an order?”Yes. In the Demander Web Orders listing, the applied filter and sort order stay active after you finalize an order and return to the list.
This applies to:
- Saved custom filters
- Period filters (for example, last N months or a specific date range)
- Sort order chosen in the listing
The filter only changes when you clear the selection, apply another filter, or choose another period.