

Route Modules
Available at:


This article explains what the routes module is and how to configure it within Demander.
What are routes
Section titled “What are routes”Routes, or customer routing, is the process of planning and organizing the order of visits that a sales representative must carry out in a given period — be it a day, a week or a month.
In other words, it’s about creating routes that allow you to serve customers in the most efficient way possible.
🔍 What is scripting for?
Section titled “🔍 What is scripting for?”It helps to:
- Reduce travel time
- Reduce fuel costs
- Increase salesperson productivity
- Ensure that all portfolio customers are visited
- Organize visits by priority, distance or frequency
- Standardize agendas and facilitate management monitoring
🎯 Benefits
Section titled “🎯 Benefits”- Avoid missed visits
- Improves the relationship with the wallet
- Help with commercial planning
- Increases salesperson assertiveness in the field
It is possible to register routes and create visiting itineraries based on customers’ locations. Thus, the seller can view each stop on the route with their respective data on the map.
How to activate the module
Section titled “How to activate the module”To activate the module, simply release the button in the application.
This configuration is at:
Company Settings → Additional Settings
When you release the button, the module will be active — just register the routes.

How to register a Route for the seller?
Routes can be registered in two ways:
- Manual by Demander Web
- Via integration, through the specific layout
On Demander Web:
Section titled “On Demander Web:”- Access the [Routes] screen (https://sistema.demander.com.br/dinamico/rotas)
- Click New
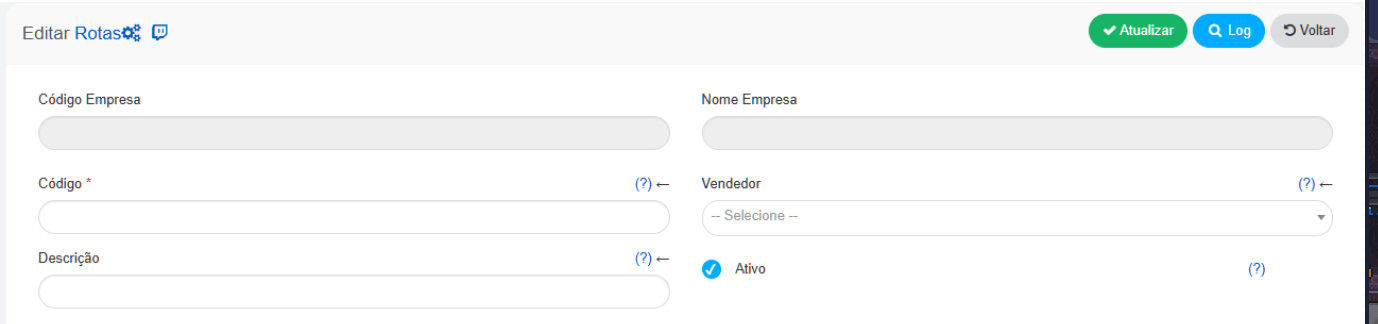
Available fields:
- Code: route identifier
- Active: inactive routes cannot be used
- Description: route name (e.g. seller, region, date, etc.)
- Seller: responsible seller; only it will view that route. It is possible to have only one salesperson per route
Route Customers:
Section titled “Route Customers:”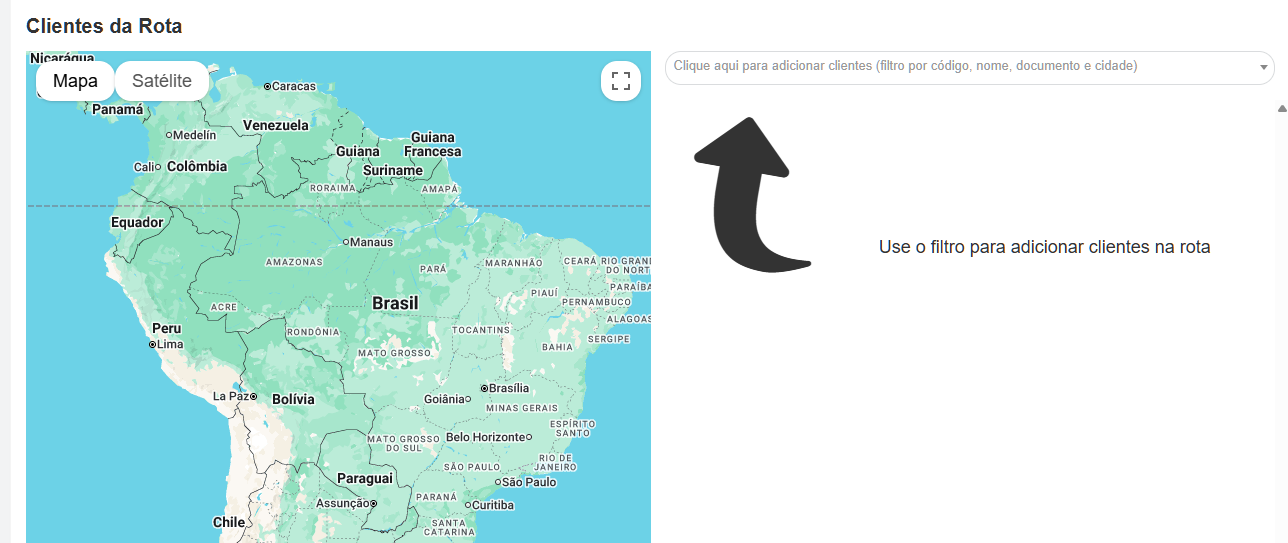
- Customer search by code, company name, business name, document (CPF/CNPJ) or city
- Customers are always added at the end of the list
- Viewing customers on the map
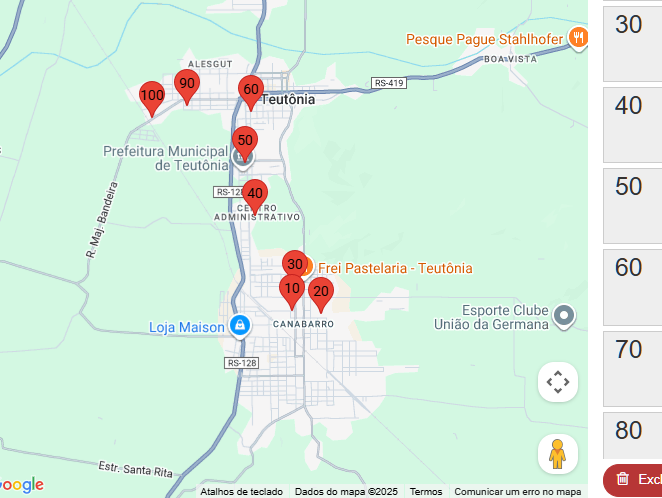
- Reordering customers via drag and drop
- Visual indication when:

- > Customer no longer belongs to the seller

>Client is inactive
After adding all customers, you can click on “See on Google Maps”, which automatically traces the route according to the selected order.

Via Integration:
Section titled “Via Integration:”It is necessary to integrate the tables:
How can sellers be allowed to register their own routes?
It is also possible to allow sellers to create and edit their routes on mobile.
To do this:
- Go to Sellers
- Go to the Configuration tab
- Enable the route editing and registration option

How do routes appear on Mobile?
After releasing the button in settings:
- The seller will see the Routes menu in the application
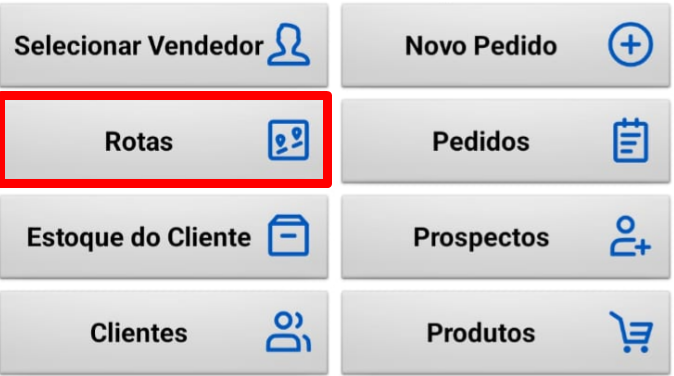
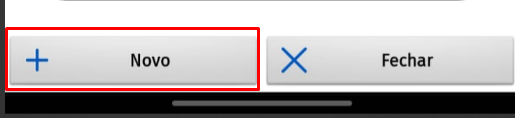
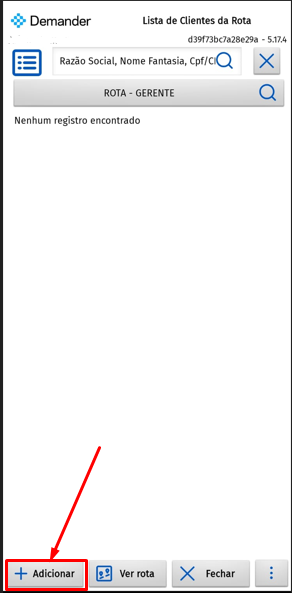
- In Select Routes, he can:
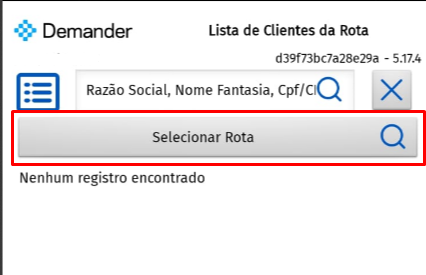
- Create a new route
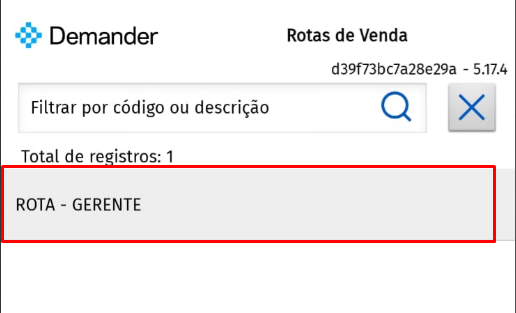
- Open an existing route
- It is possible to add new customers to the route
- By pressing a customer, you can change their position in the list
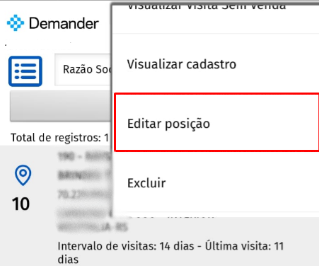
- The route can be viewed on the map
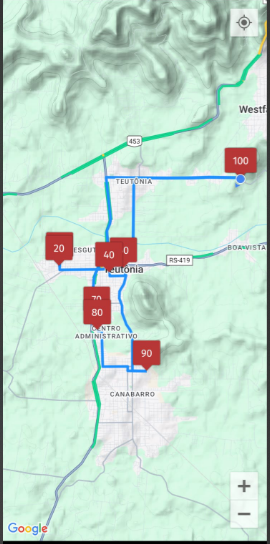
- To start an order, simply press the customer and select Place New Order
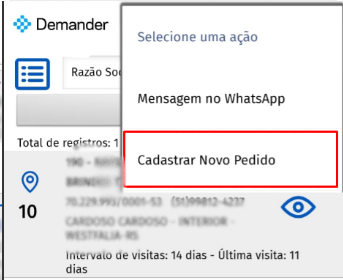
Hiding customers after ordering
Section titled “Hiding customers after ordering”After an order is placed, the customer is automatically hidden from the route for X days. This period is configured in:
Company Settings → Additional Settings

To view the customers already served, simply click on the three dots and choose “Show all customers on the route”.
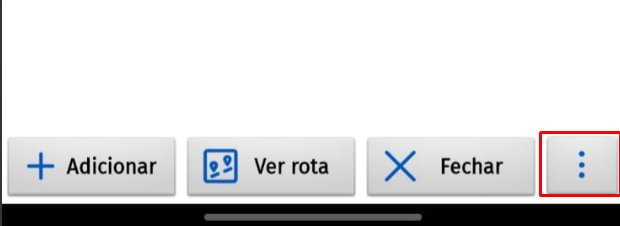
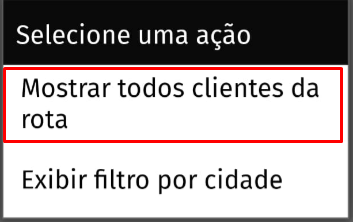
Already visited customers appear with a green flag
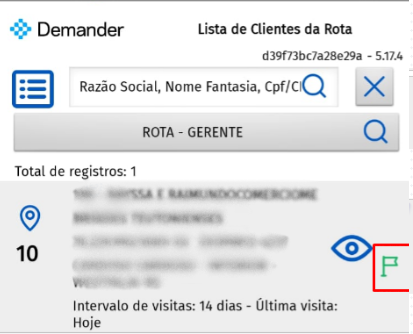
.
How to delete a customer from a route?
Deletion can be done:
By Demander Web
Section titled “By Demander Web”Just access the [Routes] screen (https://sistema.demander.com.br/dinamico/rotas) and click on the trash can next to the customer’s name.

Via Integration
Section titled “Via Integration”Please note: it is not enough to stop sending the client in Table 21 — this does not remove it from the route.To delete via integration, you must use:
Explanatory video