

How to use the Check-in and Check-out functionality (checkin)
Available at:

The Check-in process in Demander’s ordering system is a key step in ensuring that the seller is within a specific radius of the customer when placing an order. This article details how the device’s geographic position is captured, how the customer listing is generated, and how check-in and check-out should be performed in Demander to ensure compliance and efficiency in the sales process.
Capture the device’s geographic position
Section titled “Capture the device’s geographic position”The geographical position of the device is essential for check-in to work on Demander and can be obtained in two ways, following a specific hierarchy:
Last position saved on the device: Demander uses the last known position of the device, recorded by the operating system, if it was obtained in the last 5 minutes.
Best available provider: Demander automatically selects the best provider from three options:
- GPS (GPS, AGPS)
- Network
- Passive
How does the customer list work?
Section titled “How does the customer list work?”Demander checks the seller’s current location and customer coordinates to generate the visible customer listing. Operation follows the following logic:
- Display radius and range:
- The system displays all customers that fall within the defined radius and range.
- First, the customer radius and range are considered. If they are not filled in, the parameters configured for the seller are used.
- New customers registered on mobile:
- If they do not have latitude and longitude filled in or are within the configured radius, they will be displayed in the list.
- If they have latitude and longitude defined, they will be displayed according to the seller’s settings.
- Pending checkout:
- If there is a pending checkout, only that customer will be displayed in the listing, ensuring the correct flow of service.
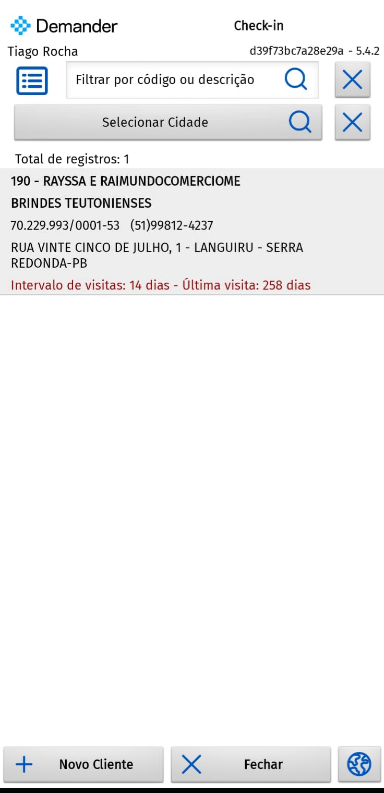
How to check in?
Section titled “How to check in?”For customers listed on the screen, only one option must be enabled: “Register Check-in”.
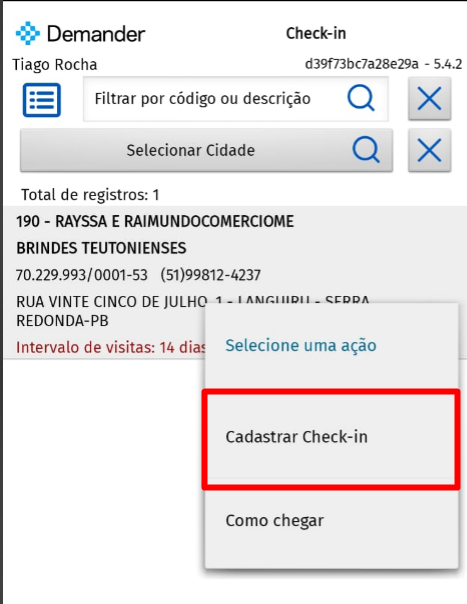
- When checking in, an event is created, initially without an event date.
- It is possible to configure the new order screen to open automatically after checking in. To find out more, you can access the article “Registrations for Check-in and Check-out”
- After issuing the order, the listing will only display the customer used in the previous check-in, forcing the seller to check out before accessing new customers
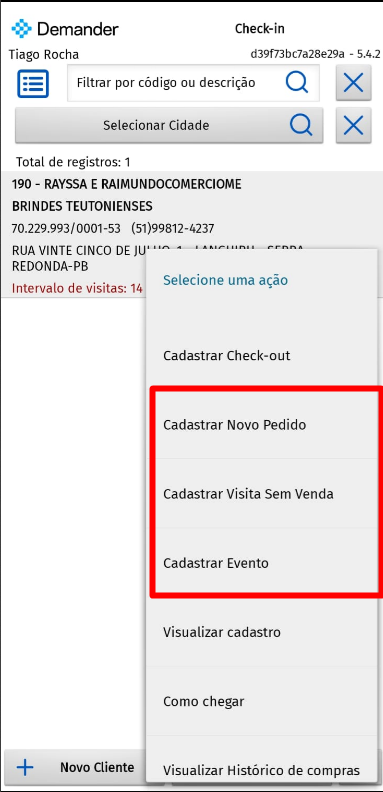
- After Check-in, other options become available:
- Register Event, New order, Visit without Sales…
- Even if the seller leaves the screen, the listing will continue to display only that customer, and will only be updated after check-out.
How do I check out?
Section titled “How do I check out?”To check out, follow the steps below:
- Return to the check-in screen.
- Only one customer will be displayed on the screen until Checkout has been completed, regardless of where the seller is.
- Press the listed customer and select the “Checkout” option.
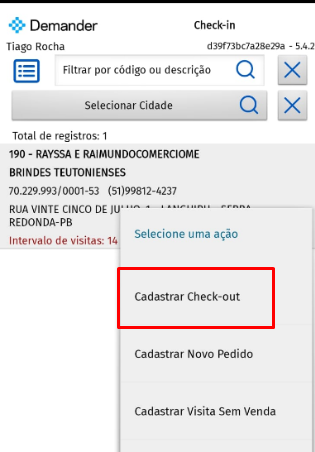
After check-out done:
- The previously created event will be updated with the check-out date and time, automatically filling in the “Date of completion” field, which was empty at the time of registration.
- The screen will be updated, and the system will again search for customers eligible for check-in registration.
- What happens to customers outside the range?
To determine if a customer is out of range, the system checks the last recorded check-in event.
Rules for verification:
- If there is a Check-in Event, the system compares the current date and time with the date of inclusion of that event.
- If the difference in days is greater than the number of days configured in the client for check-in, the client will be considered out of range.
- If there is no Check-in Event registered, the customer will automatically be considered within the interval.
What happens to customers out of range?
Section titled “What happens to customers out of range?”- They are removed from the list of customers available for check-in.
How to take a photo of a check-in?On Demander, it is possible to require the user to take photographs when registering a check-in, such as, for example, the facade of the customer’s store.
Section titled “How to take a photo of a check-in?On Demander, it is possible to require the user to take photographs when registering a check-in, such as, for example, the facade of the customer’s store.”Where is the photo registered?
- The image will be linked to the Event created for Check-in.
- It can be viewed on Demander Web, within the customer registration and other reports.
Important information:
- If the user does not take the photo, the check-in will not be issued and, consequently, no order can be generated.
Want to know more? Access the article: “Registrations for Check-in and Check-out”
Where are registered check-ins saved?
Section titled “Where are registered check-ins saved?”In Demander, there are several reports available to analyze the data obtained through registered check-ins. Some of the main reports are:
Export of registered Check-ins
Section titled “Export of registered Check-ins”In Demander, it is possible to export check-ins to the ERP.
What do I need to know beforehand?
- The Check-in functionality is part of the Events module.
- Every registered check-in generates an event in Demander, and this event can be exported.
How to export?
- Table 91 - Events→ For general export of check-in events.
- Table 302 - Event Photo