Synchronizer Installation as a Service
Before Starting
Section titled “Before Starting”- This process takes an average of 10 to 20 minutes.
- If possible, do this together with an IT staff member.
- Do not close this instruction during installation.
Summary:
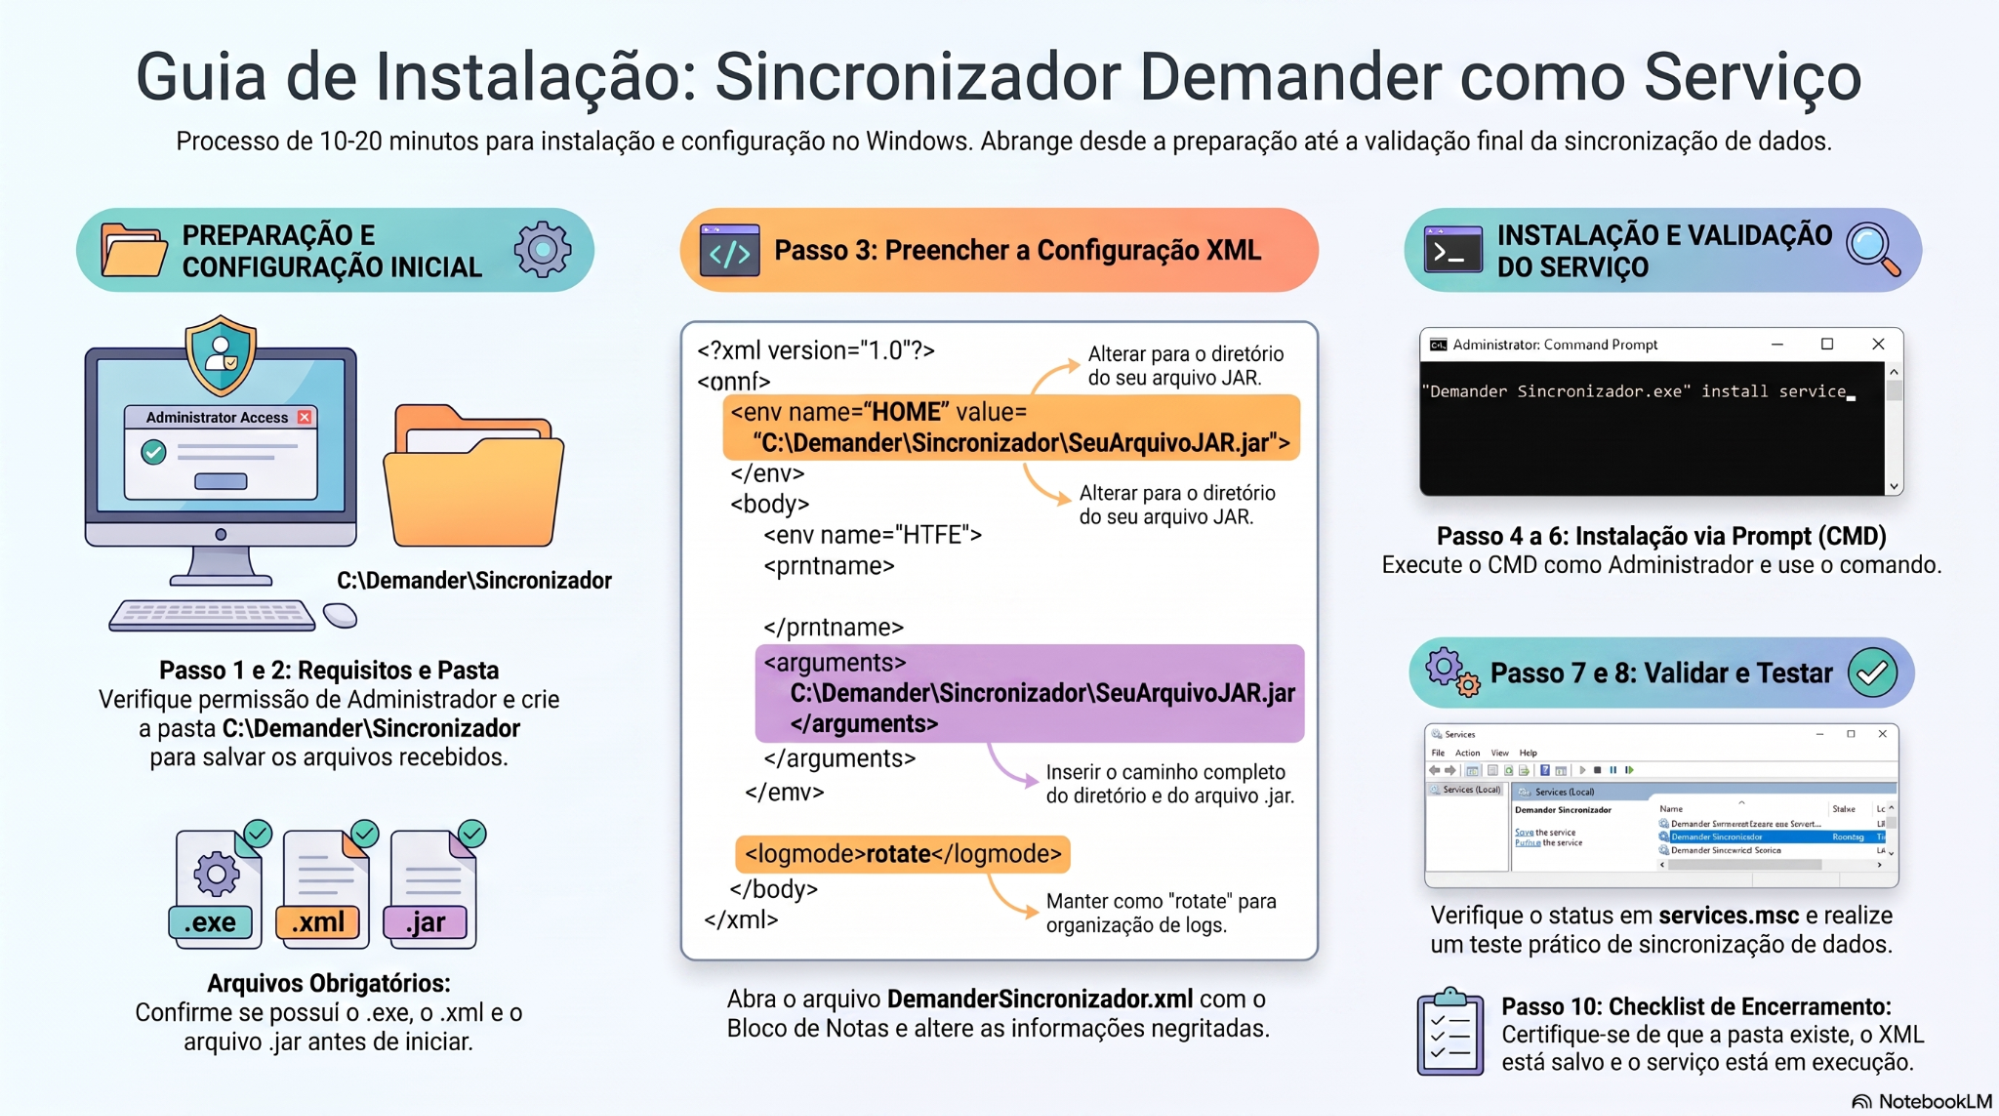
Step 1: Confirm what you need
Section titled “Step 1: Confirm what you need”1.1 Verify that you are on a Windows computer.
1.2 Verify that your user account has Administrator permissions.
1.3 Confirm that you have received these files:
- a)
Demander Sincronizador.exe(Downloads) - b)
DemanderSincronizador.xml(XML File) - c)
.jarfile (when your integration uses this file)
Step 2: Create the installation folder
Section titled “Step 2: Create the installation folder”2.1 Open Windows File Explorer.
2.2 Go to Local Disk (C:).
2.3 Create the folder C:\Demander\Sincronizador.
2.4 Copy the received files into this folder.
The files that need to be downloaded are: .exe file, .xml file, and .jar file. All three files must have the name Demander Sincronizador followed by their file extension at the end. Access the files at this link.
Regarding the function of each file:
- The
.exefile functions as being “called” by the Windows service and pointing to the.xmlfile. - The
.xmlfile functions to run commands and initialize the.jarfile, which is the Synchronizer itself that performs fetch and send procedures in the ERP.
The download location of the files is divided as follows: .jar file directly from the Demander Knowledge Base, Downloads page. The remaining two files (.exe and .xml) must be provided by the Demander contact who forwarded the document for installation.
To complete this step, you must download all three files onto the machine where the Synchronizer as a service will be installed.
Framework 3.5 Installation
Section titled “Framework 3.5 Installation”When running the service installation command via CMD, as explained in “Step 6: Install the service”, in some cases the following error may occur:
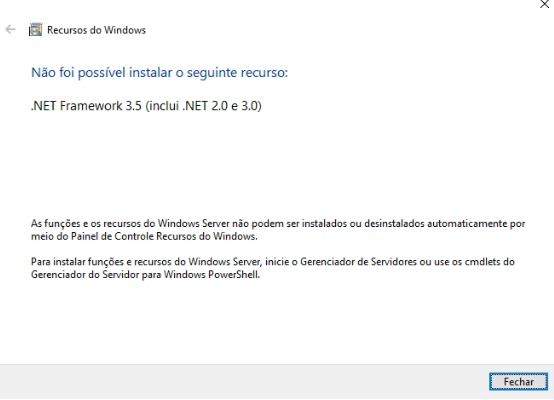
- Reason: Framework 3.5 needs to be installed or there is a network block causing it not to function correctly.
- Solution: Ask the IT/Infrastructure administrator to analyze and check the machine or network in question.
Use of .bat Files
Section titled “Use of .bat Files”When configuring the Synchronizer as a service, the default operation of .bat files inside the appropriate folder is negatively affected. However, a workaround is used to make it work for integrations requiring .bat procedures.
The solution is to transfer the execution of the .bat file to the Windows Task Scheduler, creating a scheduled task to execute the commands and perform the procedures required by the integration.
Expected result:
You should see the files inside C:\Demander\Sincronizador.
Step 3: Fill in the configuration
Section titled “Step 3: Fill in the configuration”3.1 Right-click on the DemanderSincronizador.xml file.
3.2 Select “Open with” and choose a text editor (e.g., Notepad).
3.3 Fill in the fields according to the data sent by the Demander team.
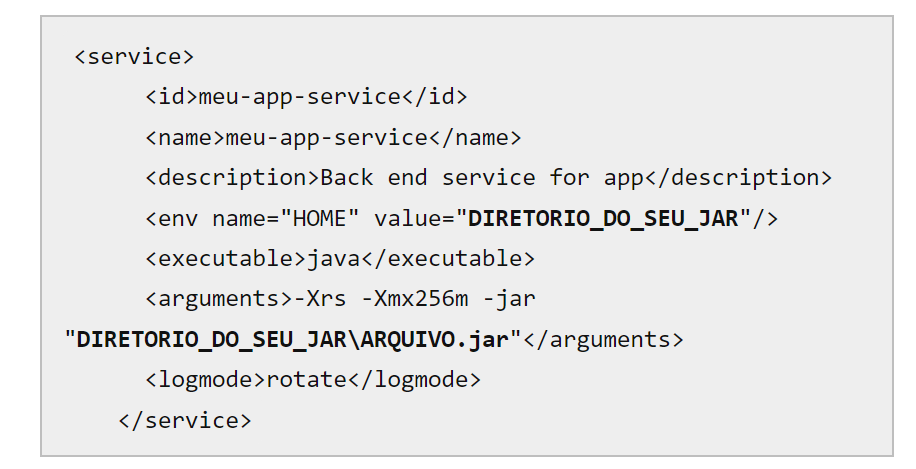
Change the bolded information shown in the image below with the installation details being configured.
3.4 Save the file and close it.
Expected result:
The XML file is saved with correct data and no required fields left blank.
Step 4: Open Command Prompt as Administrator
Section titled “Step 4: Open Command Prompt as Administrator”4.1 Click the Windows Start button.
4.2 Type CMD.
4.3 Right-click on “Command Prompt”.
4.4 Select “Run as administrator”.
4.5 If Windows confirmation appears, click “Yes”.
Expected result:
The black Command Prompt window opens with administrator privileges.
Step 5: Access the folder in Command Prompt
Section titled “Step 5: Access the folder in Command Prompt”5.1 In the Command Prompt window, type:
cd C:\Demander\Sincronizador5.2 Press Enter.
The Prompt prompt should show that you are inside C:\Demander\Sincronizador.
Step 6: Install the service
Section titled “Step 6: Install the service”6.1 In Command Prompt, type exactly:
"Demander Sincronizador.exe" install service6.2 Press Enter.
Expected result:
Service installation completes without error messages.
If an error appears:
Close Command Prompt, open it again as administrator, and repeat steps 5 and 6.
Step 7: Installing the Synchronizer as a Service
Section titled “Step 7: Installing the Synchronizer as a Service”7.1 Press Windows + R.
7.2 Type services.msc and click OK.
7.3 In the service list, look for the Demander Synchronizer service.
7.4 Check the status.
Expected result:
The service must appear in the list.
If it says “Running”, it is correct.
If stopped, right-click the service and click “Start”.
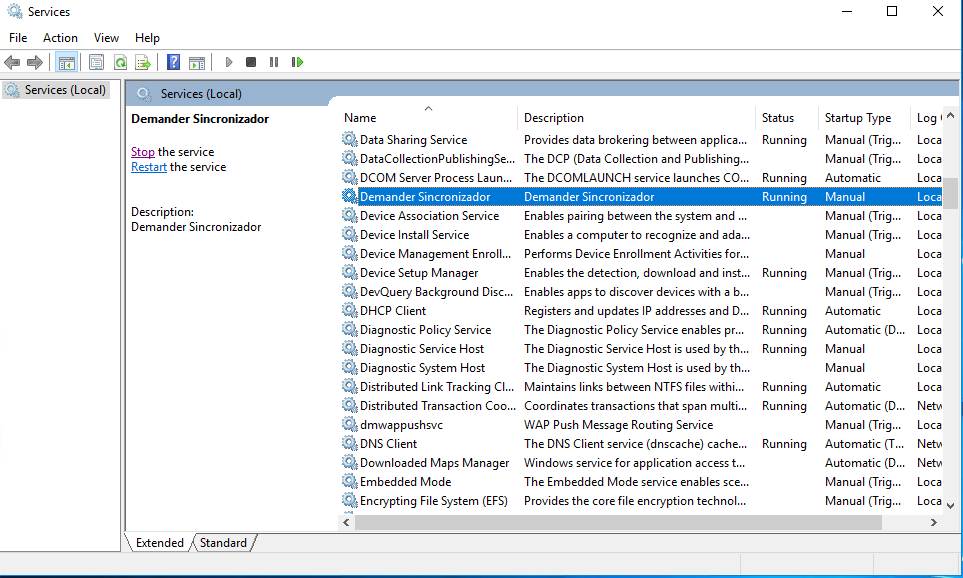
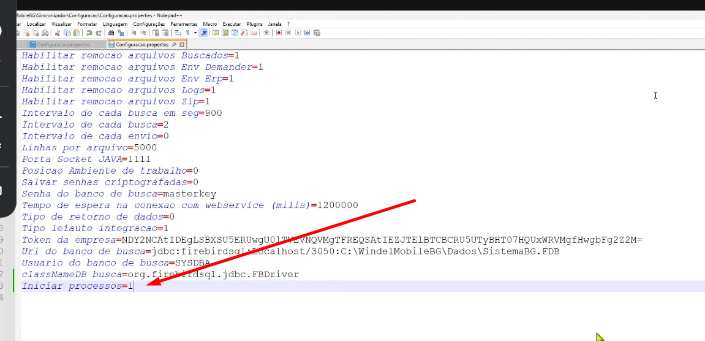
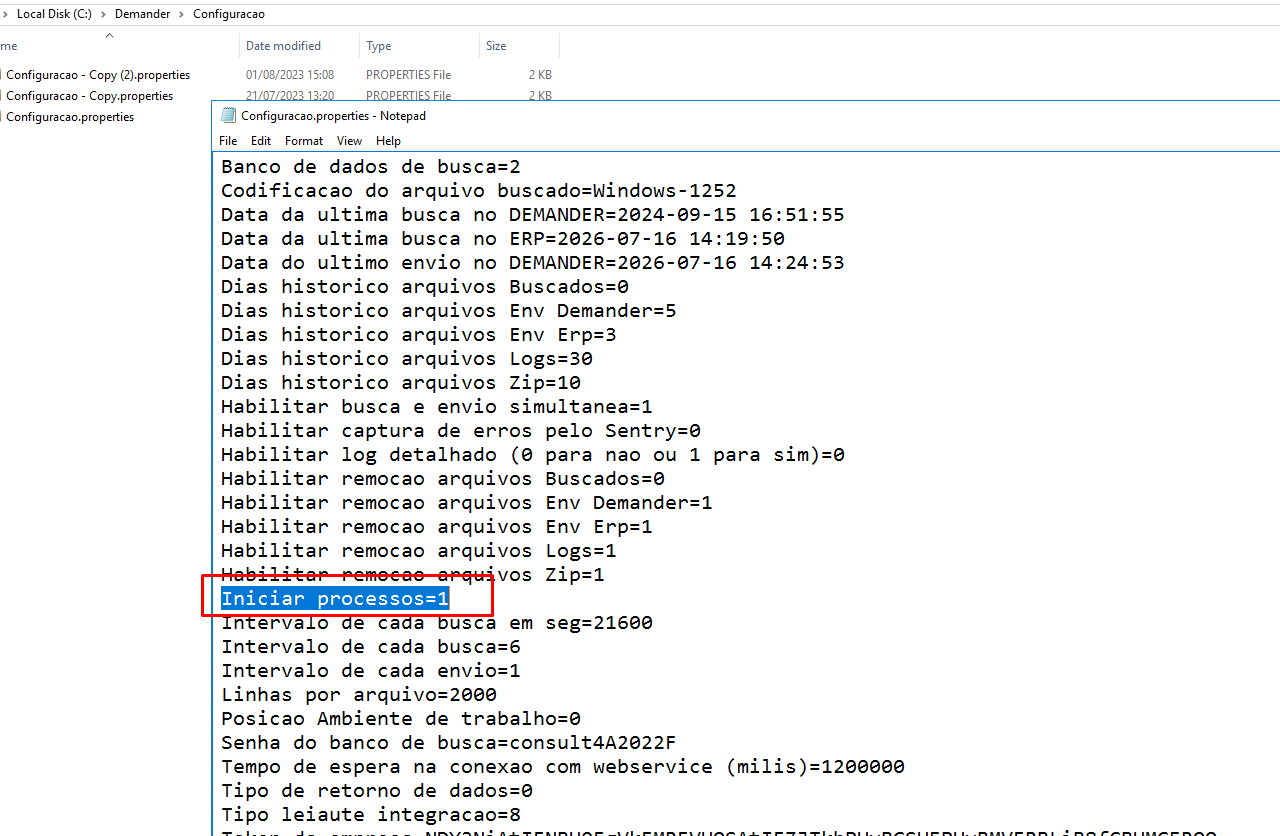
Also in the Synchronizer, access Demander\Sincronizador\Configuracao\Configuracao.properties.
Edit the file and set the highlighted line to 1:
Step 8: Quick functional test
Section titled “Step 8: Quick functional test”8.1 Wait a few minutes after starting the service.
8.2 Perform a simple synchronization test (according to client routine).
8.3 Confirm data was synchronized.
Expected result:
Synchronization occurs without failure.
Synchronizer Update
Section titled “Synchronizer Update”As previously explained in the supporting files section, the .jar file is the Synchronizer itself, in the same version downloaded from the Demander Knowledge Base.
Thus, to perform an update to a newer version, you must stop the service if running and replace the .jar file with the updated one.
Synchronizer needs to be installed on the same machine, what to do?
Section titled “Synchronizer needs to be installed on the same machine, what to do?”Create two different folders for the synchronizer, for example: Sincronizador 1 and Sincronizador 2.
After installation, access the configuration folder, edit the file, and insert the line:
Porta Socket JAVA=1111(Can be any port)
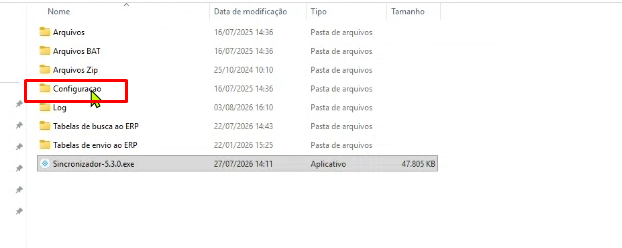
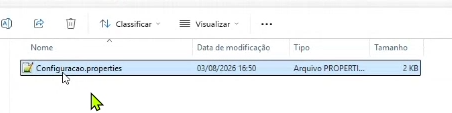
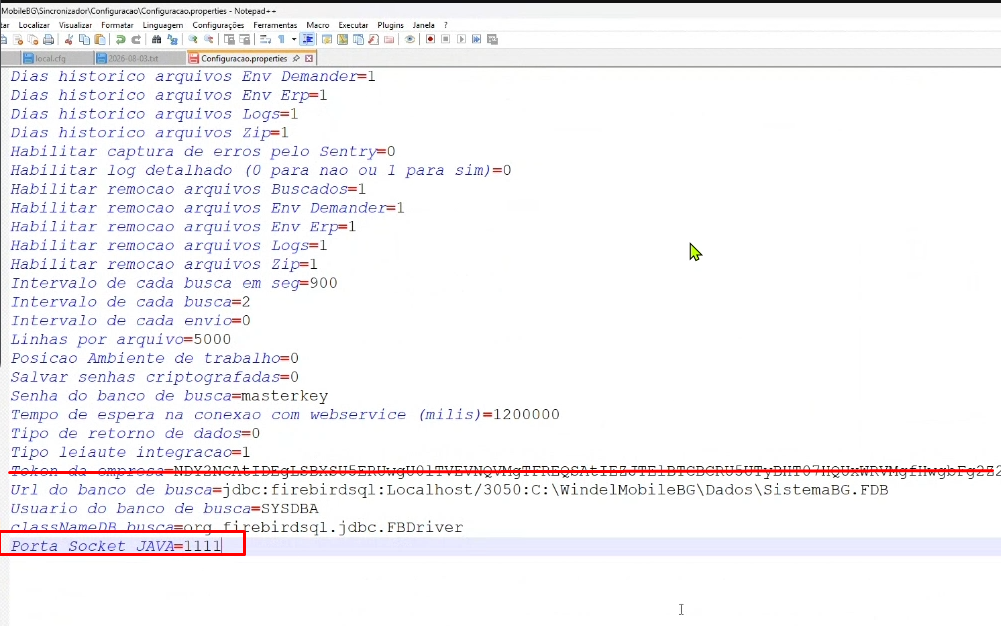
After adding this line, save the file.
Follow the same procedure for the second synchronizer, changing only the Port.
Also add in the files:
Iniciar Processos=1