

Configuration of Integration with Atak ERP
This document presents the necessary configurations for the integration of Demander with ERP Atak.
Activating Integration with Atak:
Section titled “Activating Integration with Atak:”Before starting an integration, make sure that the settings below are configured correctly, both in Atak and in Demander, as this is essential to avoid possible integration errors.
Settings in Atak
Section titled “Settings in Atak”- Create, with the support of ERP Atak, a user named “DEMANDER” in the ERP;
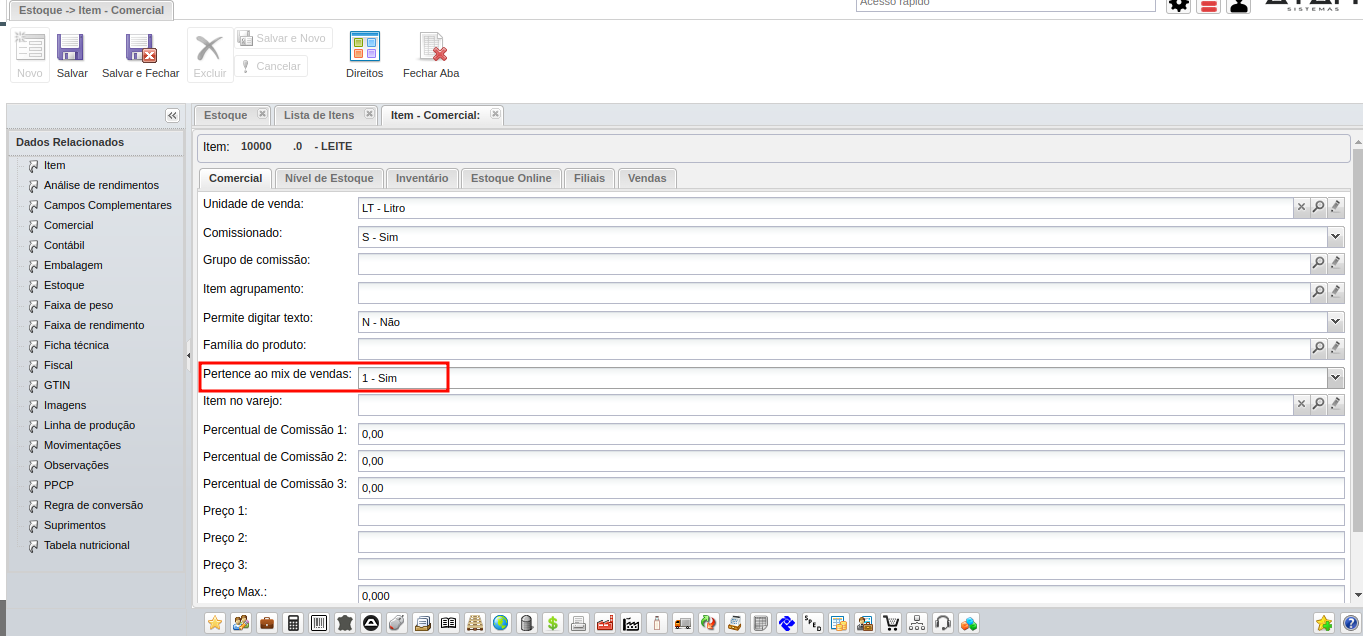
- In the “Belongs to the sales mix” field, on the “Commercial” tab, the item must be marked as ** Yes ** in order to be imported into Demander;
- You must configure a unique email for each seller;
- All products must be associated with a Price List for the product price to be imported.
Settings in Demander (* Indicates that the field is mandatory in Demander)
Section titled “Settings in Demander (* Indicates that the field is mandatory in Demander)”- In the menu System registrations
 Atak Integration, it will be possible to configure a new integration or modify one if it already exists;
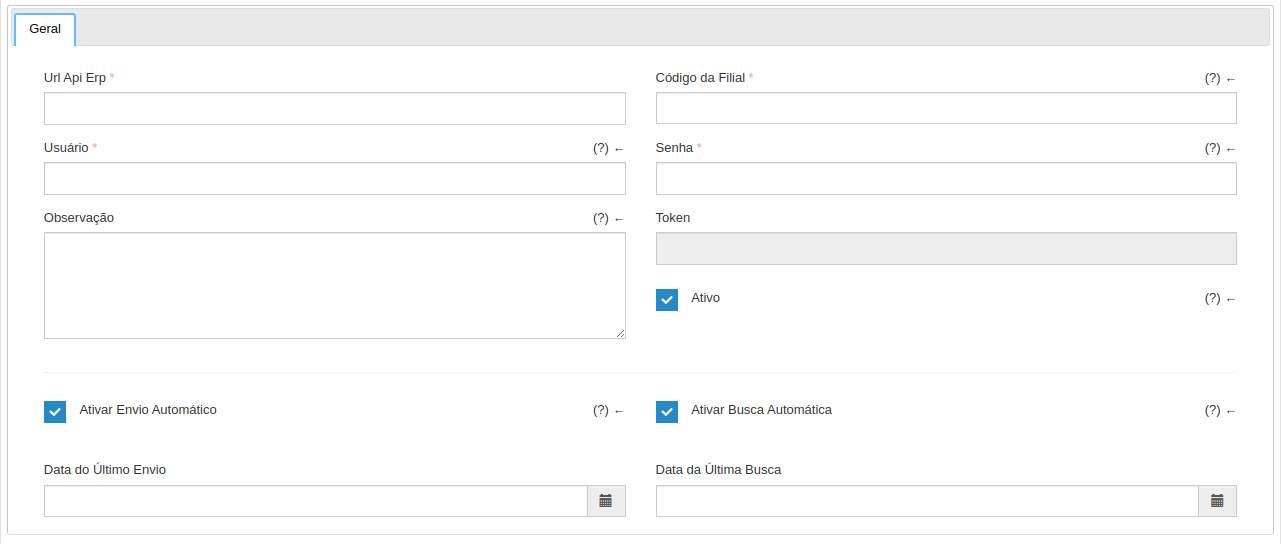
- *Url Api Erp: enter the URL of your ERP’s API. Ex.: http://179.175.151.144:8030/api;
- *Branch Code: branch code according to ERP Atak, will be used to send all orders;
- * User: user created for the integration, in this case “DEMANDER”;
- * Password: password of the user created for the integration;
- Note: used only for useful note-taking purposes, not used in integration;
- Token: presents the token created after a data search, used for informational purposes only. With each new search, a new token will be generated.
- Active: when checked, the integration will be active or inactive if unchecked;
- Activate Automatic Sending: when checked, data will be sent to the ERP automatically by Demander every hour;
- Activate Automatic Search: when checked, the data search in the ERP will be carried out automatically every hour;
- Last Submission Date: date and time when the last data was sent to the ERP;
- Last Search Date: date and time when the last search occurred in the ERP.
- In the menu Registrations
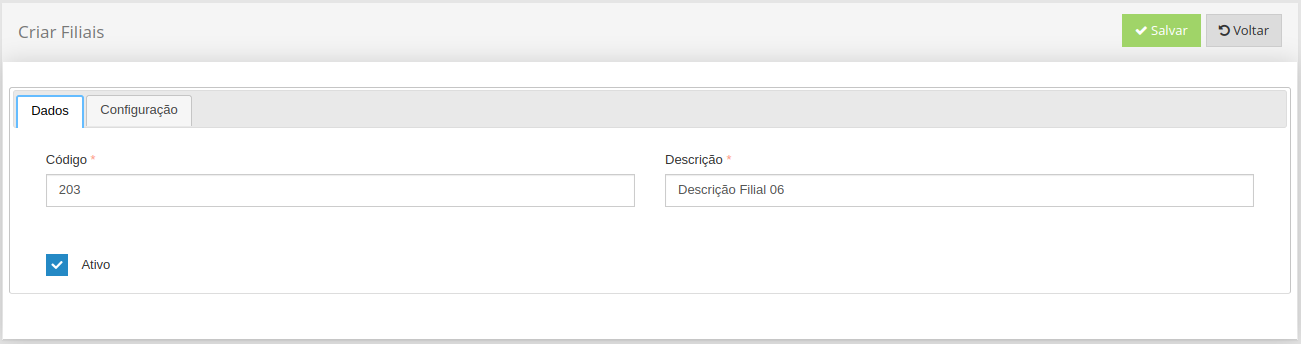
 Branches, the company’s branches must be registered, if any. In the “Data” tab, the Code field and the Description field must be exactly the same as those registered in Atak;
- In the menu System registrations
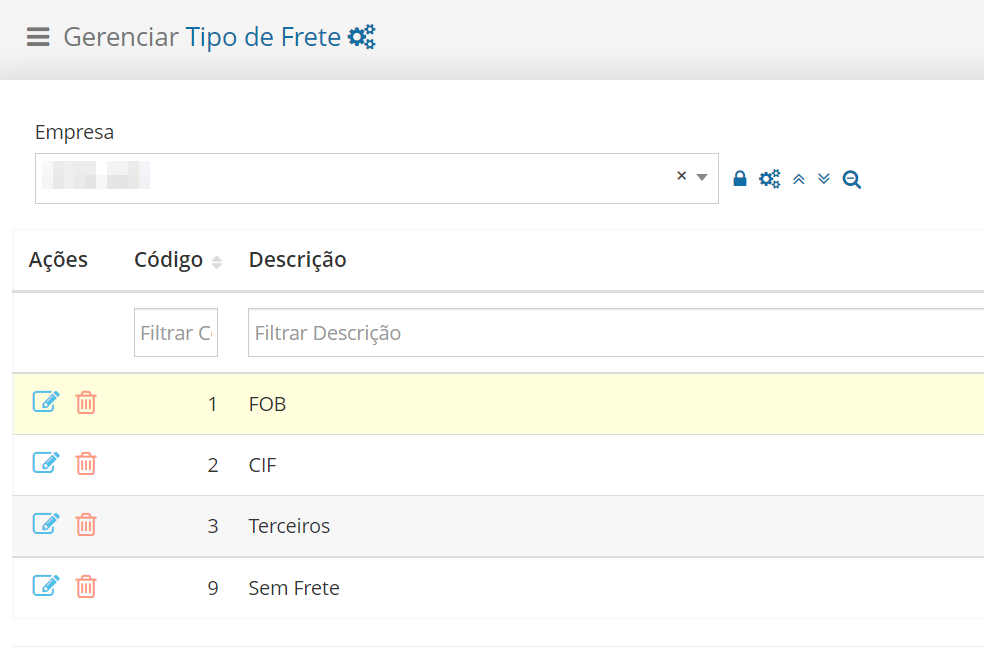
 Shipping Type, they must be registered as shown in the image below;
Data synchronization with Atak:
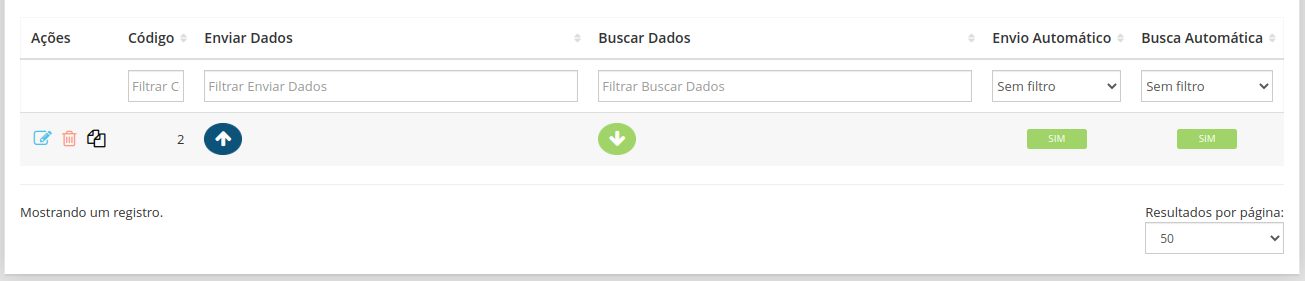
Data synchronization with Atak occurs automatically every hour, if the automatic sending and searching fields are selected in the integration settings. You can also perform a search or send the buttons manually.
Additional Configuration for Send or Search:
Section titled “Additional Configuration for Send or Search:”When making a shipment, only records created or changed in Demander after the ‘Last Submission Date’ will be sent. In the case of search, only the product search will use the ‘Last Search Date’ to filter records created or changed in Atak after this date. Other types of registrations will be returned in full, regardless of the date of creation or change. If there is any specific need, both the ‘Last search date’ and ‘Last submission date’ fields can be cleared, so that all records can be searched or sent.