

Custom fields in the customer (input) (PlugSales)
In this article we will teach you how you can add input fields to the PlugSales customer record.
To activate a new field, go to the customers tab, and enable the “add custom field” option:

Once the field is added, it will be necessary to assign the preferred name and enable the type of data it will receive. You must also define a default value in case the field is not filled in.
With the custom field created, and its name and type defined, a new parameter with its name will be available:

This parameter will receive the value filled in this field when performing a new registration. And like the other parameters, this can also be used in insert:
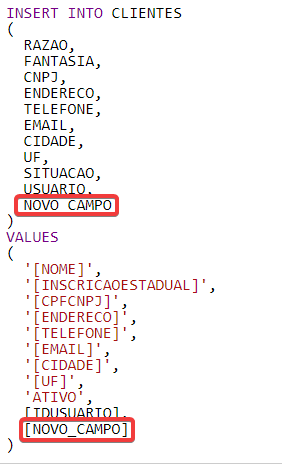
The value that this parameter will receive will depend on the TYPE of field you are using:
Type: “Options”
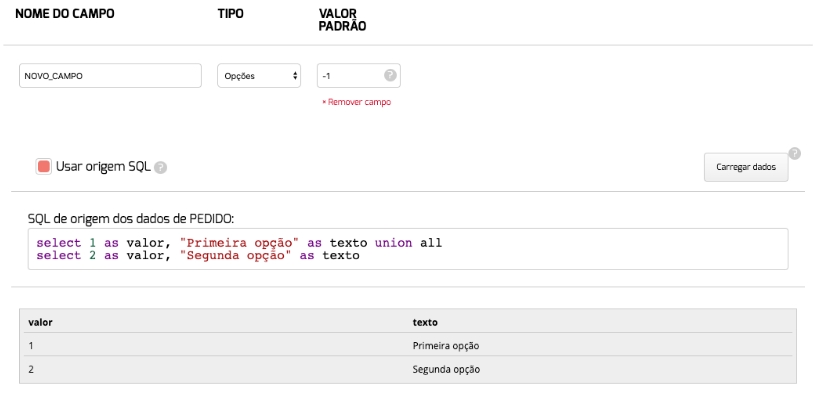
Section titled “Type: “Options””If you want to create a custom selection field in PlugSales, you can select the Options type and then configure the collection of data that will be shown as selectable options in the application.
To use this field it will be necessary to select a source table or use the SQL source method, where the records returned must obrigatoriamente, have two properties:
- value: this property will be used in PlugBot to replace the insert parameter of a new registration.
- text: this property will be used in PlugSales to show the user which option they can select.
* NOTE: The query result must return two columns, TEXT and VALUE. If you are using ‘SQL Source’, you must use the database’s ‘ALIAS’ function to rename these columns. In Firebird integrations, parameters must contain double quotes (“text” and “value”). Example:* Select column1 as “value”, column2 as “text” from table*
See:
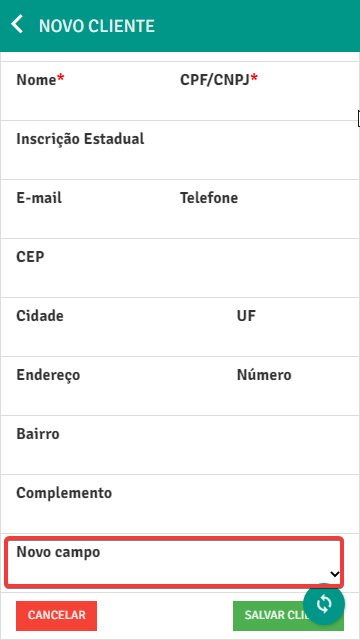
Here’s how it will appear in the app:
Type: “String”
Section titled “Type: “String””This field will receive any type of information, whether numbers or letters. The values entered in this field will be sent to the new parameter, which can be inserted into your database.

You must also define a default value in case the field is not filled in.
Type: “Number”
Section titled “Type: “Number””This field will only receive numeric values. The values entered in this field will be sent to the new parameter, which can be inserted into your database.

Type: “Date”
Section titled “Type: “Date””This field will be displayed in calendar format in the application, allowing the user to simply select a valid date.
The date selected in this field will be sent to the new parameter, which can be inserted into your database.
