

3. Your application > How to register customers via the application? (PlugSales)
This article aims to explain how to register customers through the application, using PlugBot to correctly insert data into the database.
In this article you will see:
- How to access PlugBot
- Where to insert the customer registration SQL
- Required parameters for insertion
- Example of registration SQL
- How to register through the app
- How to validate if the insertion was completed
Accessing PlugBot
To register customers through the application, the process is simple.
First, open PlugBot in the browser.
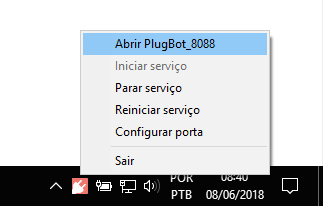
The number 8088 displayed when accessing may vary depending on the port defined at the time of PlugBot installation.
After accessing:
- Go to the Customers tab
Locate the free SQL field to fill
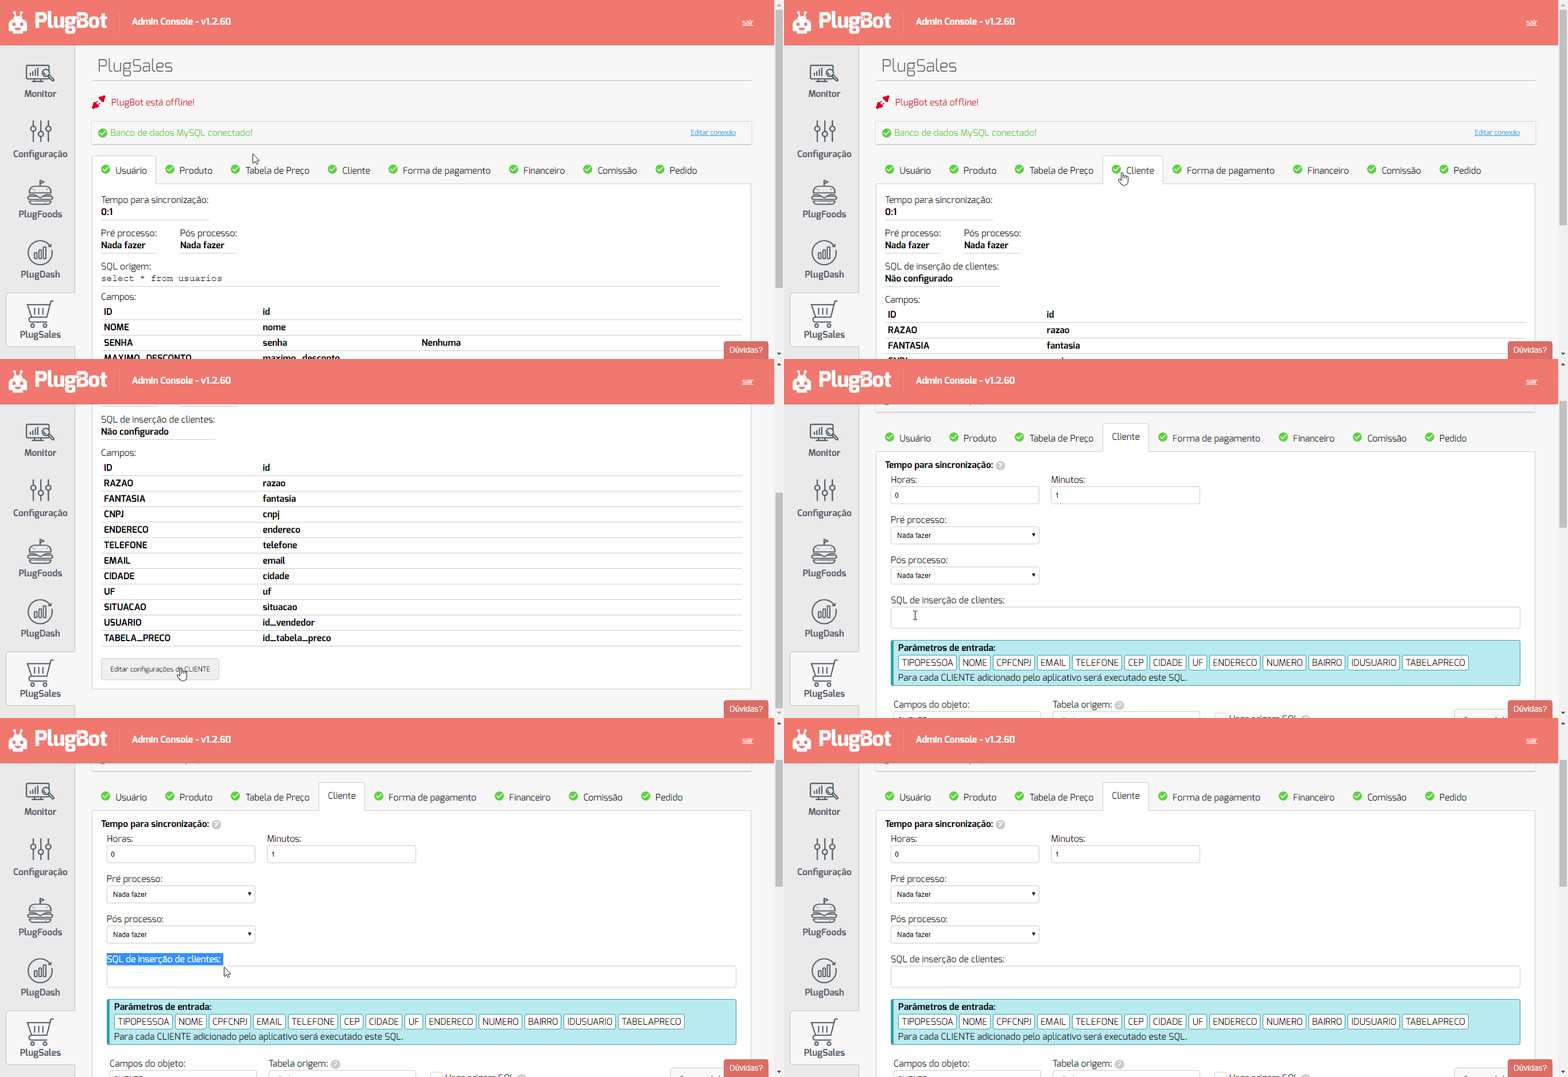
In this field, the SQL command responsible for inserting customers registered in the application directly into your database will be configured.
Configuring Insert SQL
In the free SQL field, the query responsible for inserting customers must be inserted.
For the registration to work correctly, it is necessary to comply with the input parameters sent by the application, respecting their types.
Available parameters
-
TYPEPERSON String field that receives the type of person: Individual or Legal Entity.
-
NAME String field that receives the customer’s name or company name.
-
CPFCNPJ String field that receives the customer’s CPF or CNPJ.
-
EMAIL String field that receives the customer’s email.
-
PHONE String field that receives the customer’s telephone number.
-
zip code String field that receives the customer’s zip code.
-
CITY String field that receives the customer’s city.
-
UF String field that receives the status (UF) of the client.
-
ADDRESS String field that receives the customer’s address.
-
NUMBER String field that receives the address number.
-
NEIGHBORHOOD String field that receives the neighborhood.
-
IDUSUARY Integer field that receives the ID of the user logged into the application.
-
TABLEAPRECO Integer field that receives the ID of the price table selected during registration.
-
COMPLEMENT String field that receives the complement of the address.
-
STATE REGISTRATION String field that receives the customer’s state registration.
Insert SQL Example
After configuring the parameters correctly, the SQL will look similar to the example below:
INSERT INTO CUSTOMERS
(person_type, reason, cnpj, email, telephone, zip code, city, UF, address, seller_id, price_table_id, end_complement, state_registration)
VALUES
(‘[TYPEPESSOA]’, ‘[NAME]’, ‘[CPFCNPJ]’, ‘[EMAIL]’, ‘[PHONE]’, ‘[CEP]’, ‘[CITY]’, ‘[UF]’, ‘[ADDRESS]’, [IDUSUARIO], [TABELAPRECO], ‘[COMPLEMENTO]’, ‘[INSCRICAOESTADUAL]’)
After entering the query in the corresponding field, click Save settings to save the data.
Registering customers through the application
With the configuration saved, customer registration can be carried out directly in the PlugSales application.
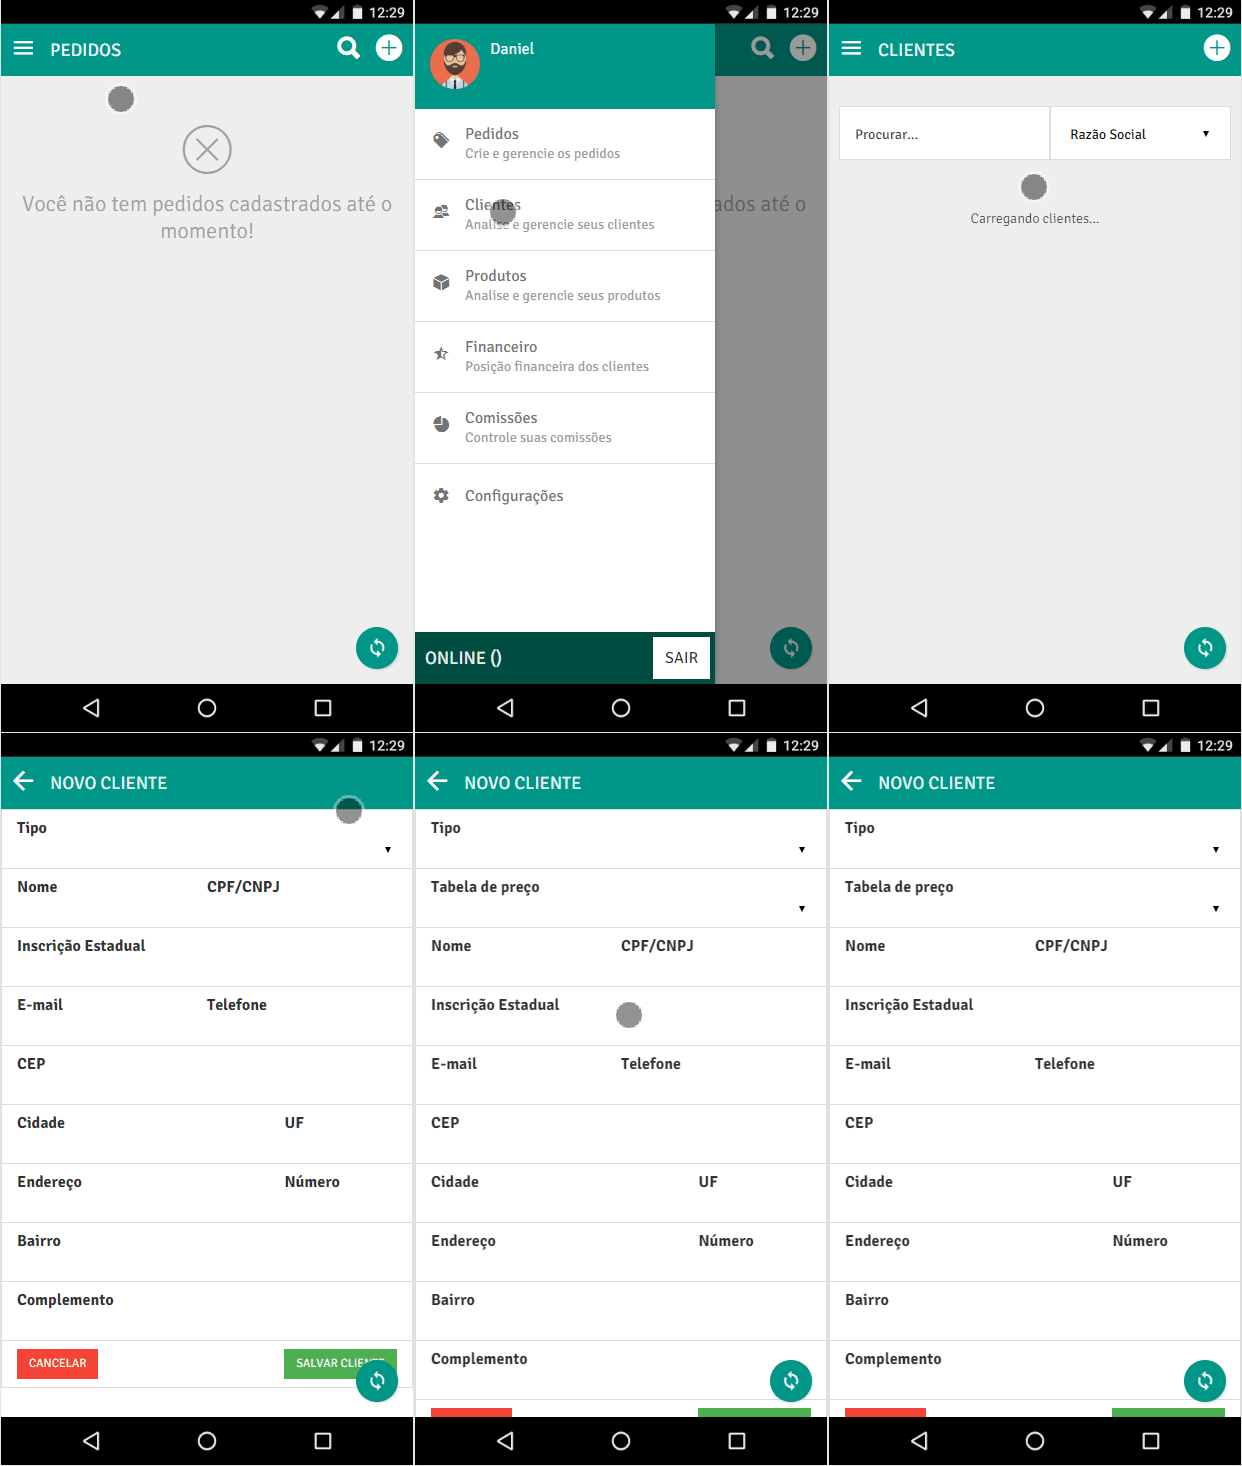
To register:
- Access the Customers tab in the application
- Click the “+” button to add a new customer
- Fill in the requested fields
- Save the registration
A new window will appear to fill in the customer information.
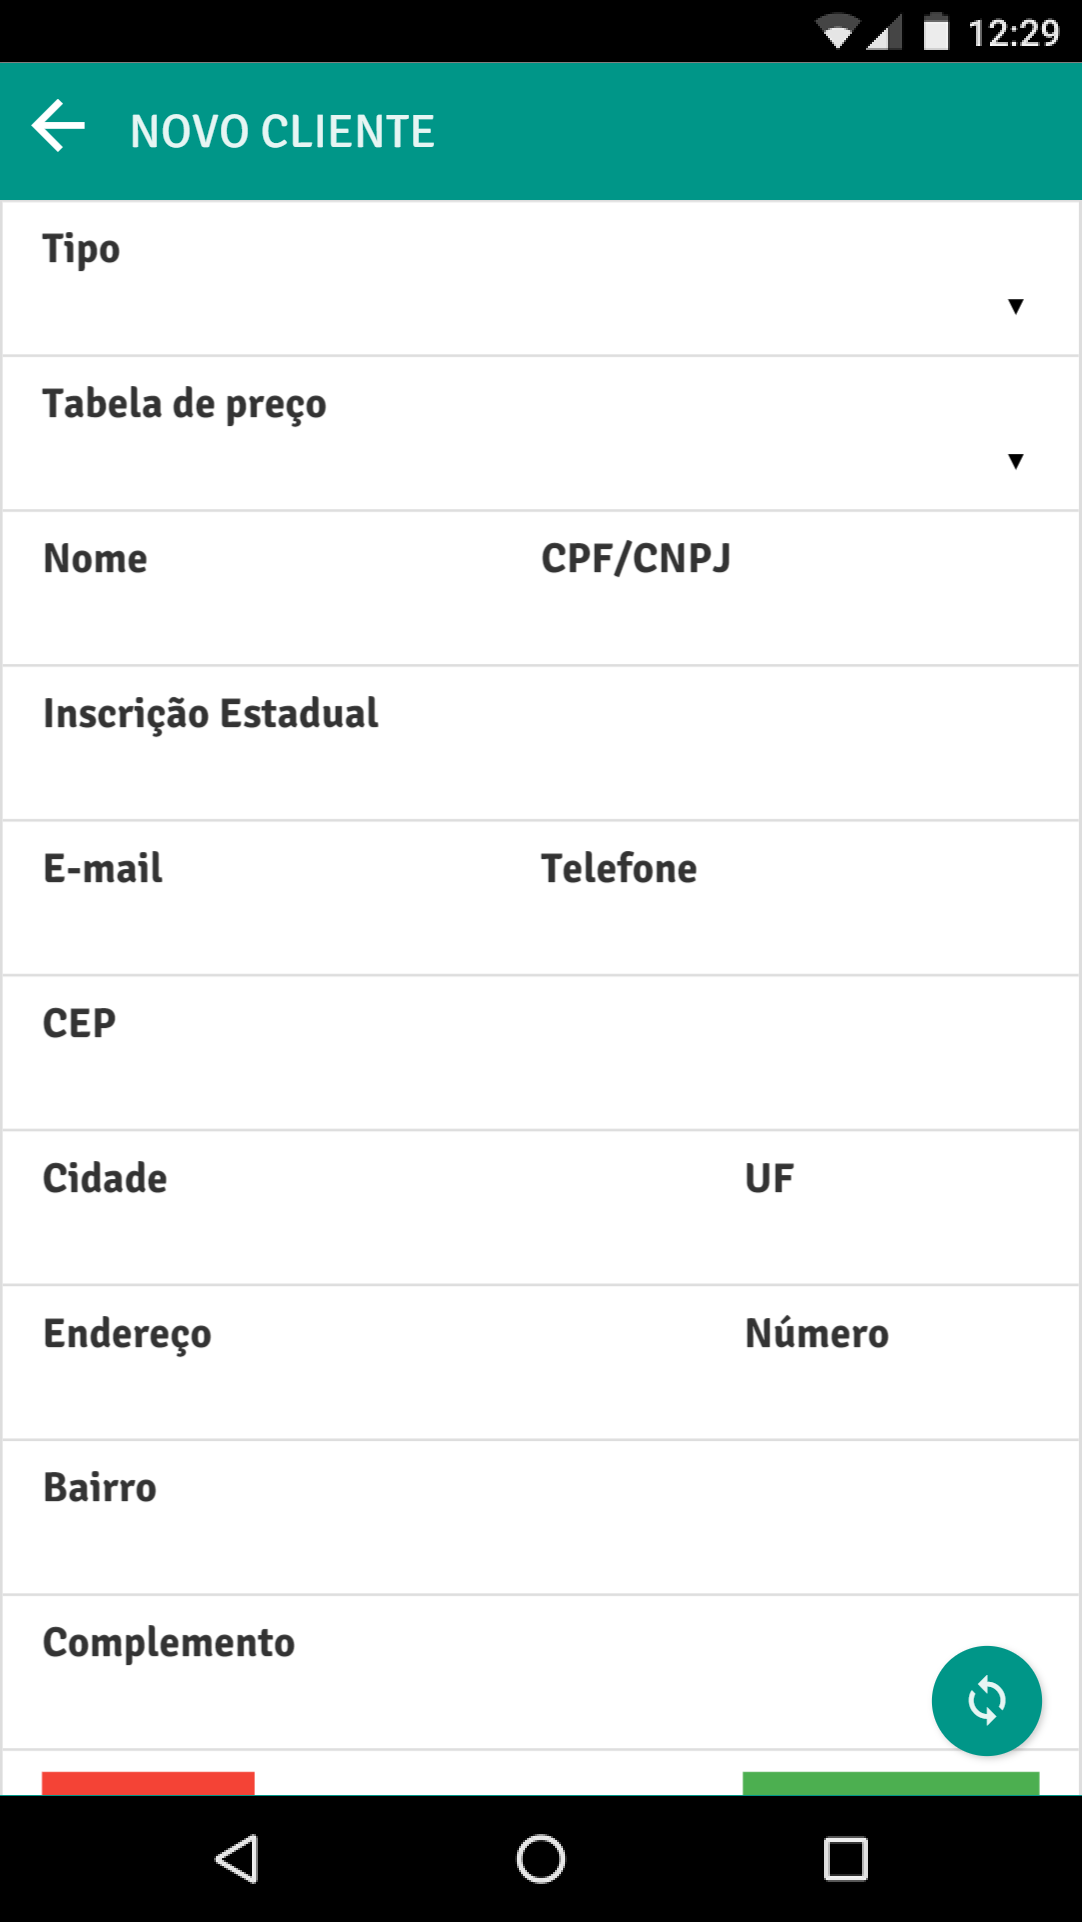
A new window will appear to fill in the customer information.
Optional and mandatory fields
Section titled “Optional and mandatory fields”The mandatory fields for registration are:
- Type of Person
- Name
- Price Table (when this option is enabled in PlugBot)
The remaining fields can be filled in as needed.
Registration validation
After completing registration in the application, the process will be carried out automatically.
To confirm that the insertion was successful:
- Check PlugBot log
- Look for a message indicating SQL execution without errors
Then, consult the database and confirm the insertion of the new customer

If the process occurs correctly, the client will be available in the database and ready for use in the system.